Setting up Projects & Clients
Members can track time on specific projects and clients for reporting, invoicing or billing purposes
Jibble is a great project time tracker, if we may say so ourselves! Projects are used to track time against projects and clients together. It is a feature that is not tied to activities.
Clients are part of projects and they can be assigned to more than one project. When a member is clocking in with a project, the client attached to the project is also tracked along with the project.
This article covers:
Adding projects
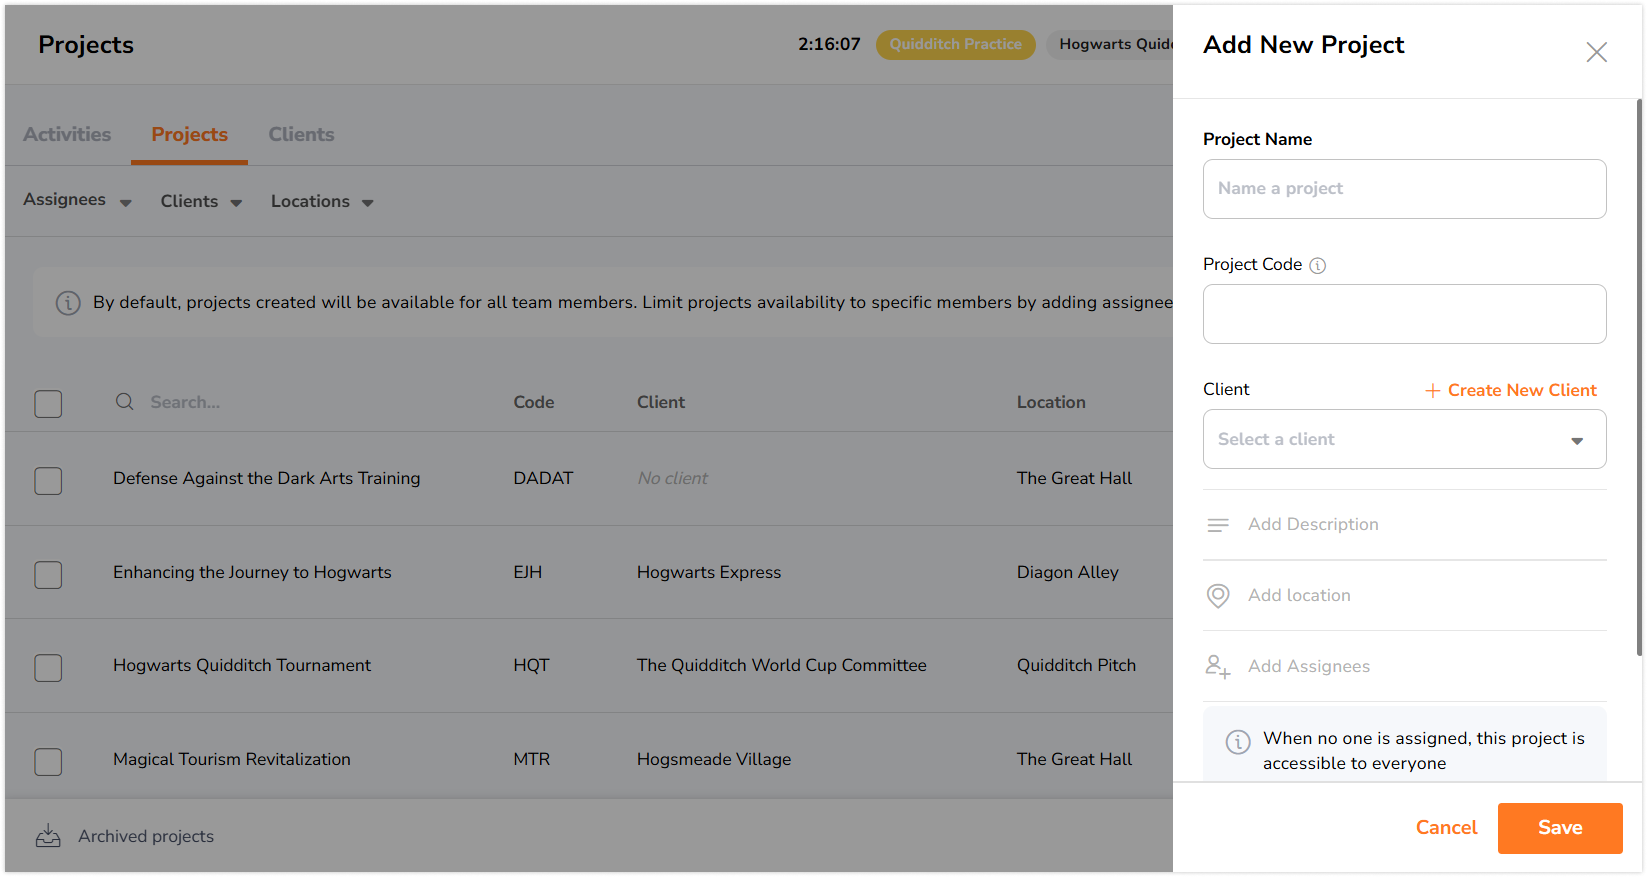
To add a project:
-
Go to Activities & Projects > Projects > Add Project.
-
Type in Project name.
-
Add Project code (optional). This code can be alphanumeric (e.g., 3A).
-
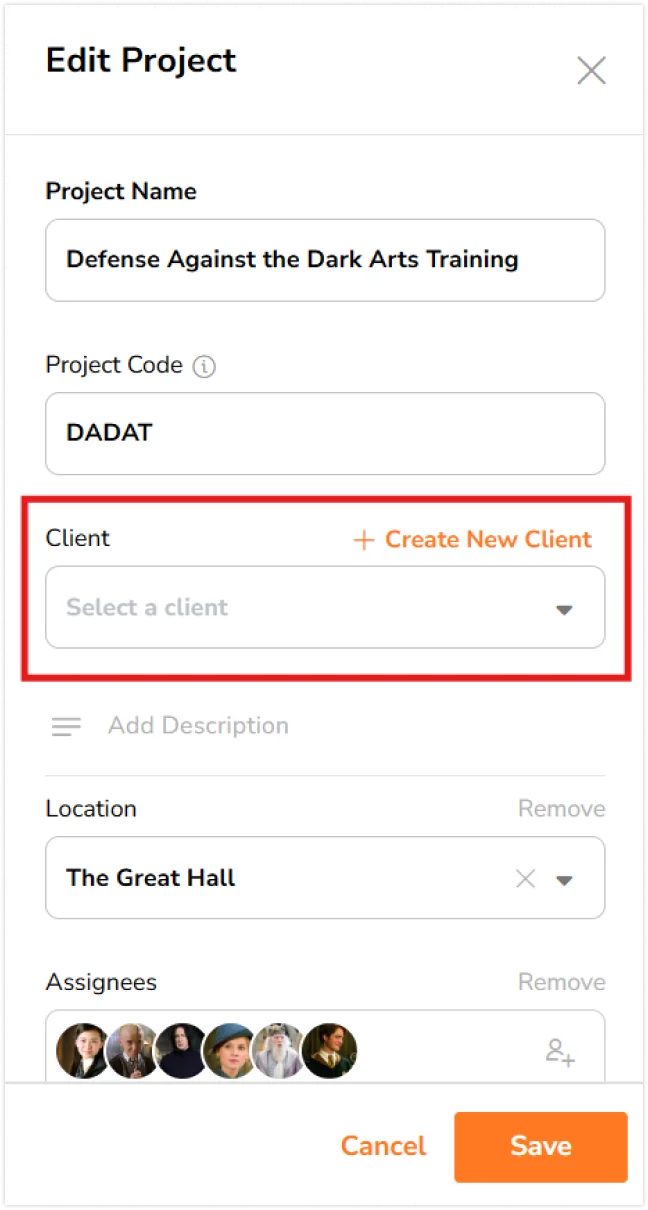
Assign a client to the project (optional).
-
Add a description (optional).
-
Assign a location to the project (optional).
-
Assign either individual members or groups to the project (optional).
-
Click Save.
By default, all projects are visible to all team members and groups. You can assign individual members or groups if you have set up groups. Or find out how to create and manage groups.
When people (or groups) are assigned to a project:
-
The project is only available to those people assigned to it.
-
People who aren’t assigned to it will not have access to this project anymore.
You can now make it mandatory for members to clock in with a project using the Custom Time Tracking rules.
When a location is assigned to a project:
-
People who are assigned to a project will have the location tied to their tracked time. You are able to export to view this under Tracked Time Report.
To filter projects:
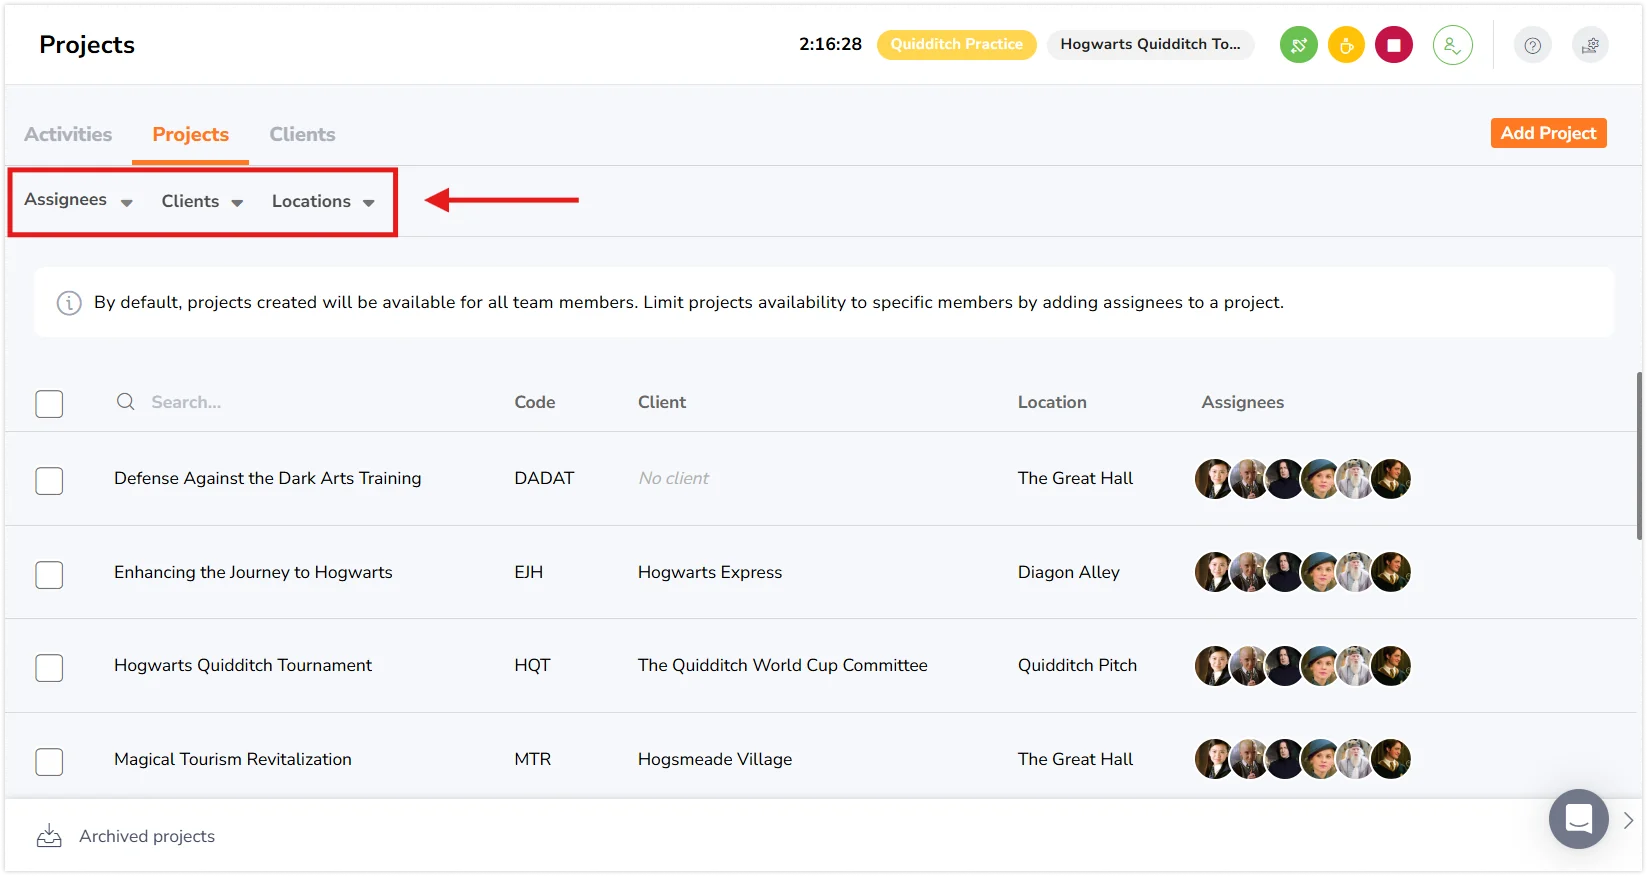
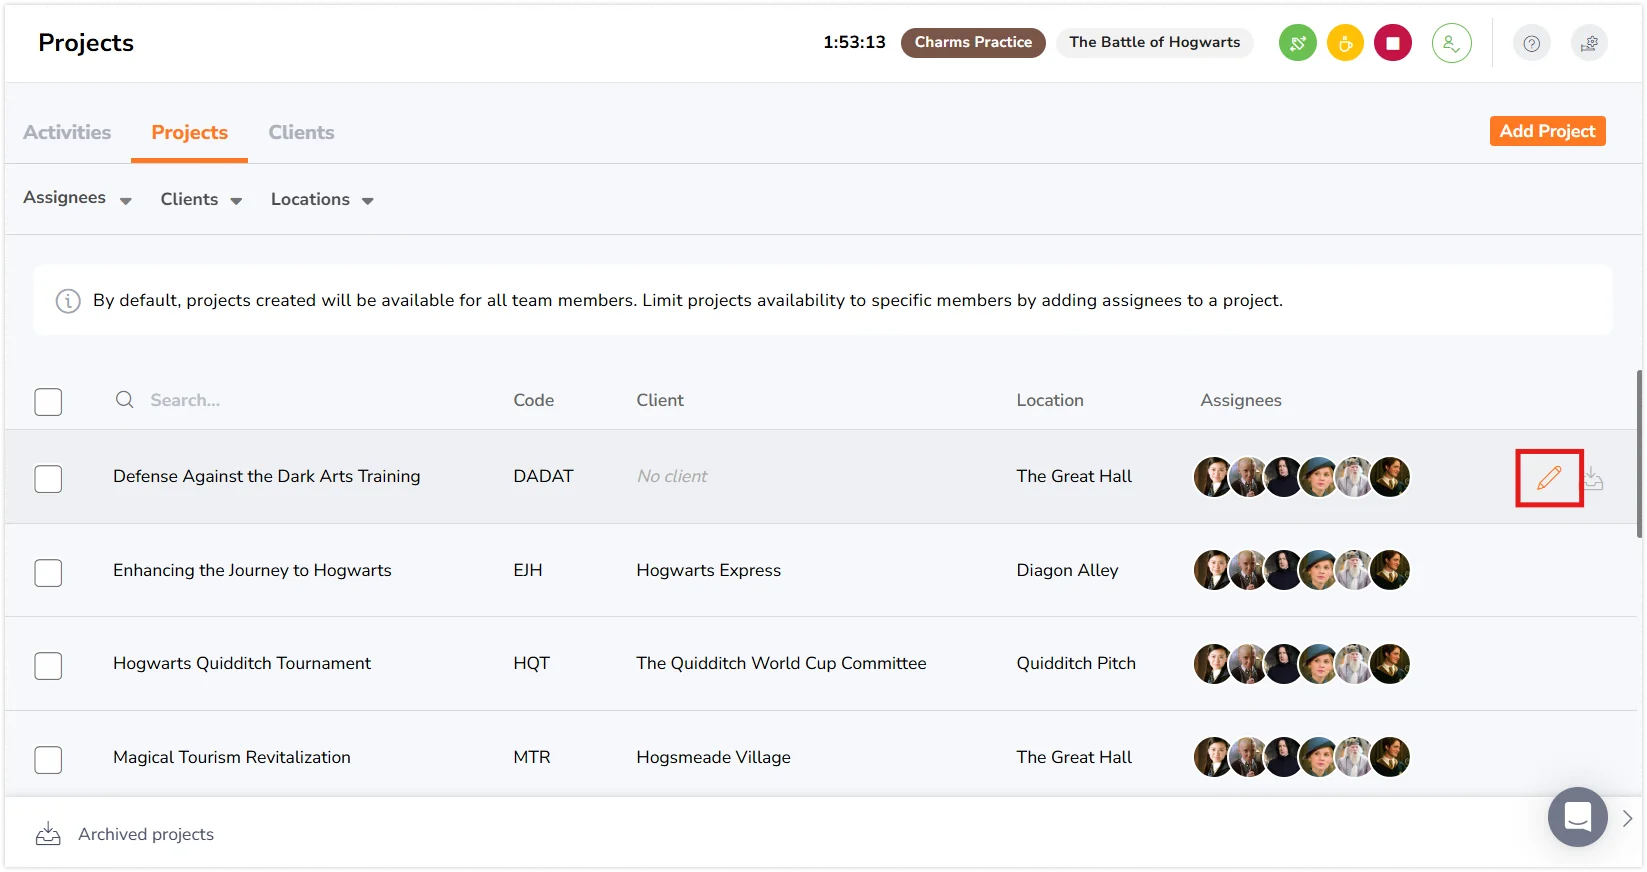
- On Projects tab, locate the filter options of Assignees, Clients, and Locations above the list of existing projects.

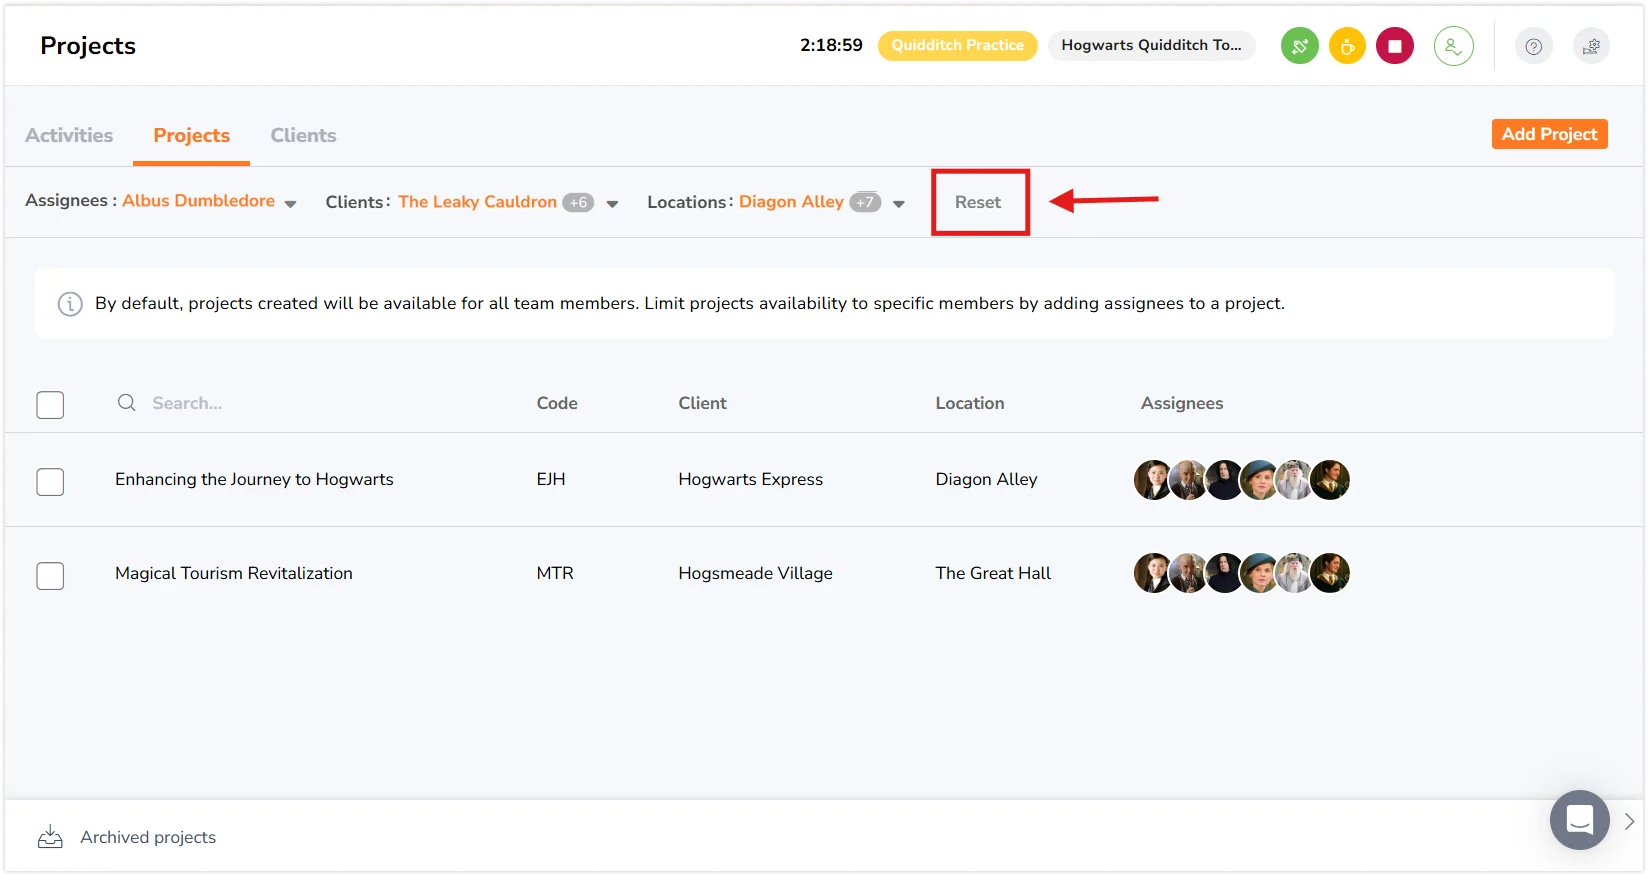
- When filters are in use, the project list will be updated based on the project assignments.
- To clear a filter, use Clear selected/Clear selection, which is available within the respective dropdown menus.
- If you want to remove all applied filters, click Reset to clear everything.

Adding clients
To add a client:
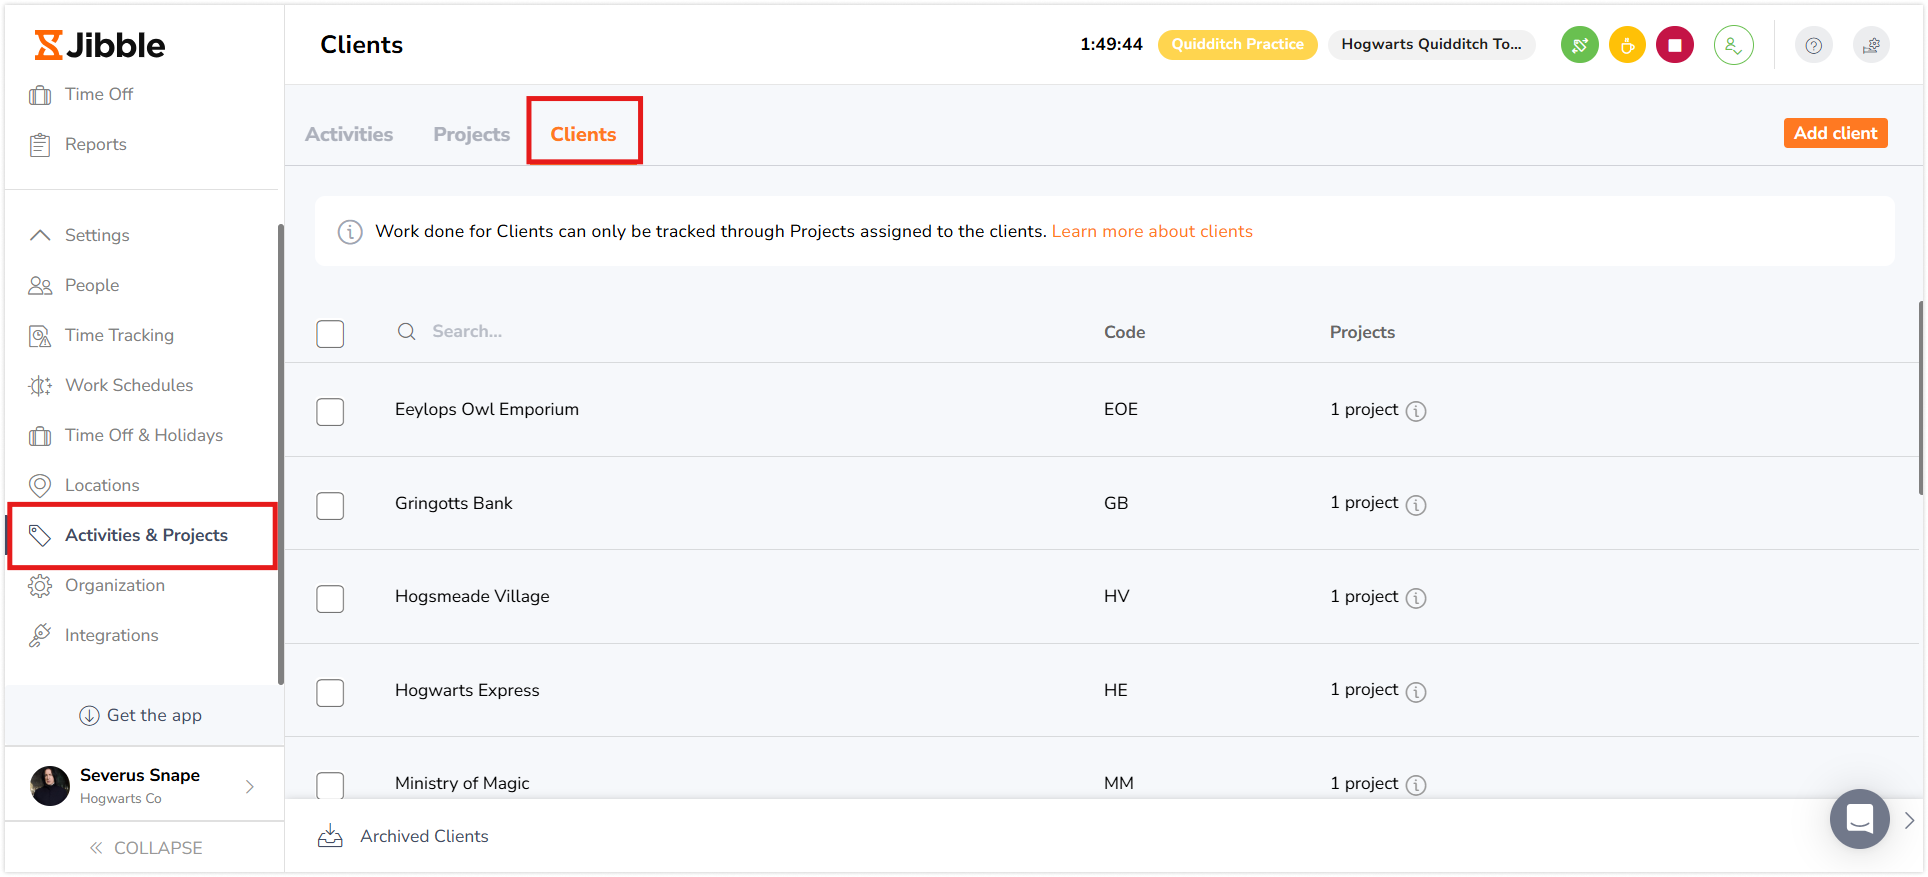
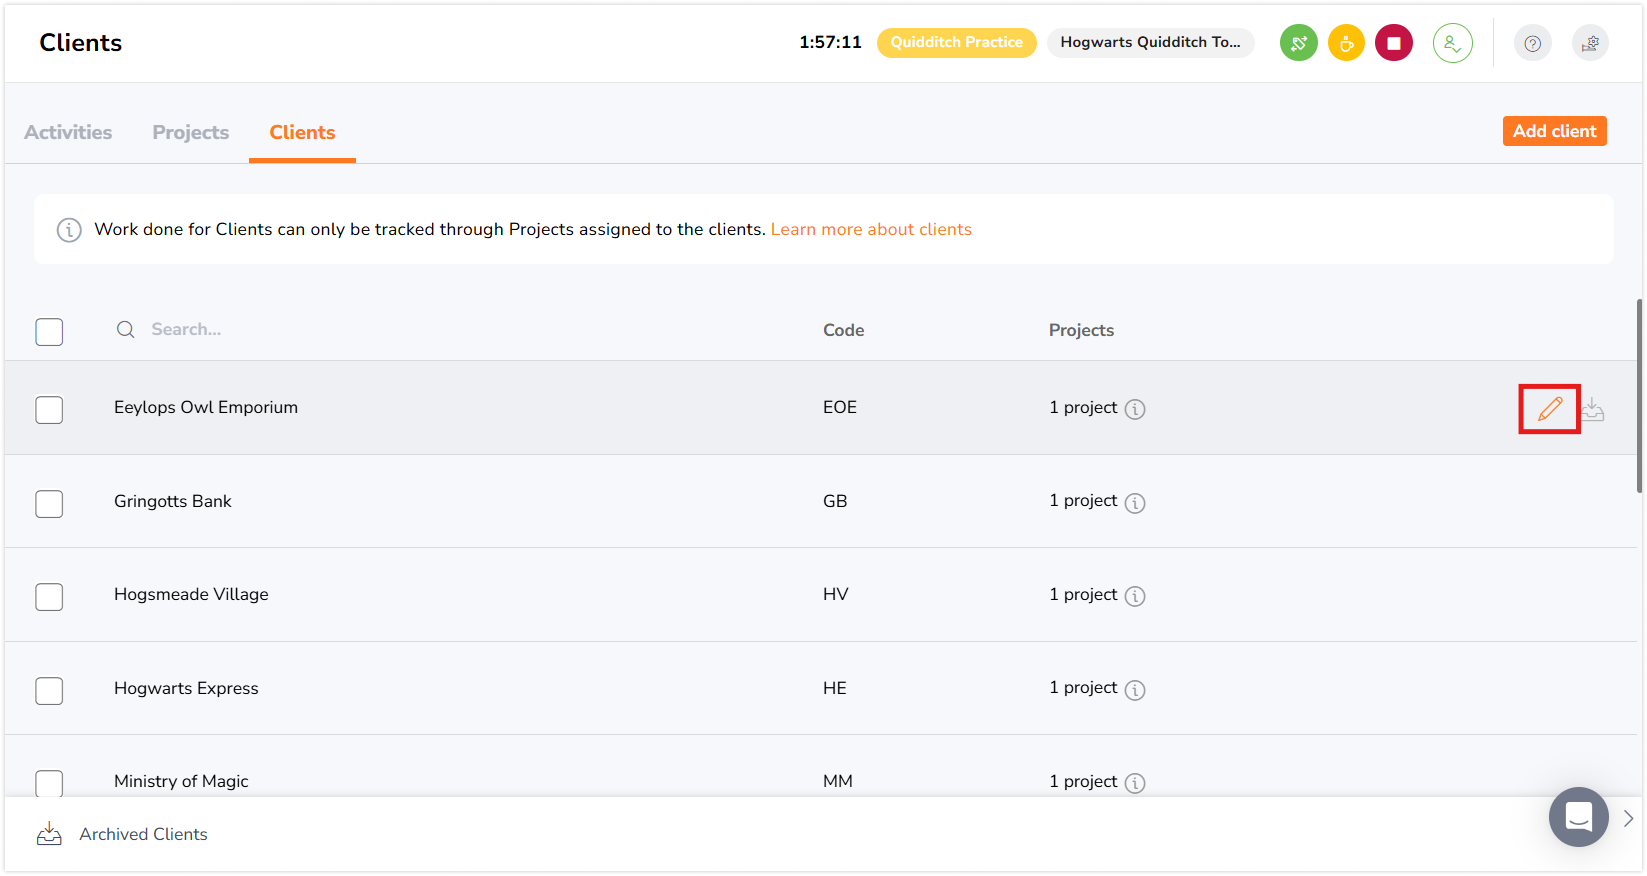
- Go to Activities & Projects > Clients.

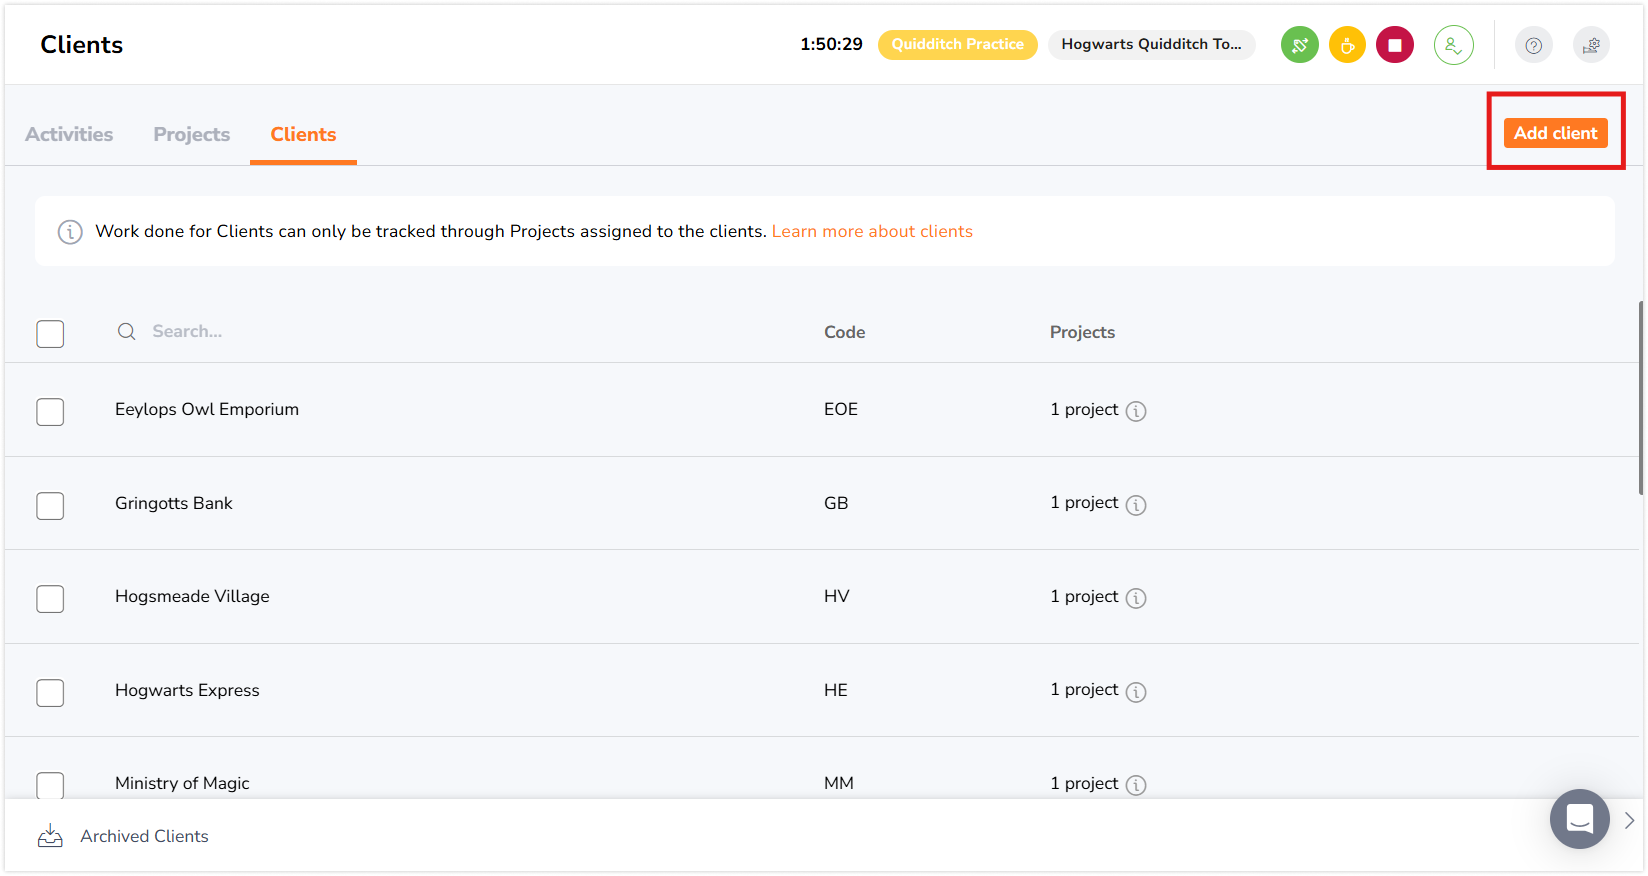
- Click on Add Client.

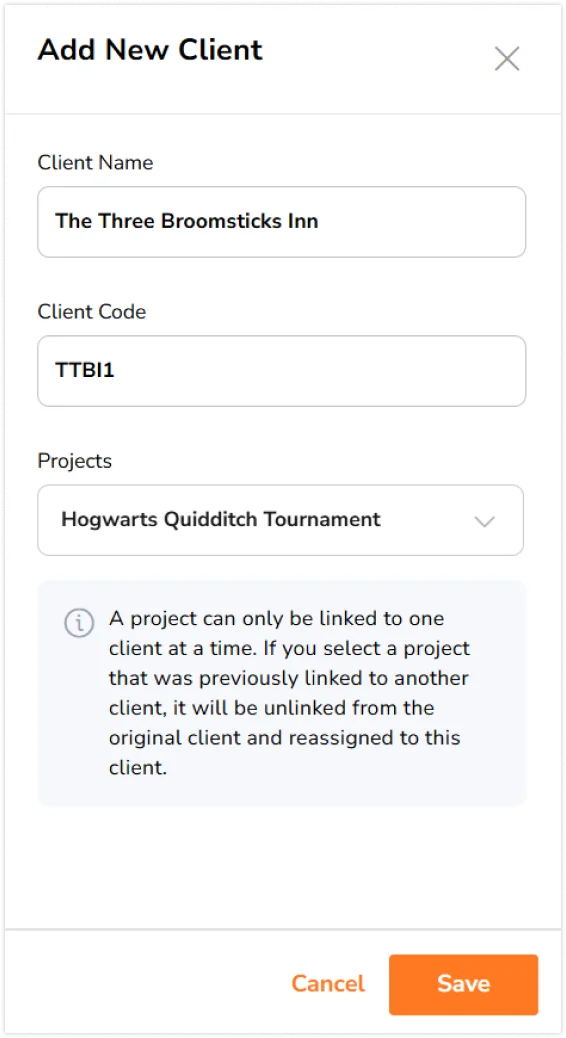
- A sidebar will appear where you need to input the client details.

- Type the Client name.
- Add a Client Code (if applicable). This code can be alphanumeric (e.g., 3A).
- Click Save.
Note: You can assign multiple projects to one client.
Assigning Clients to Projects:
Once you’ve added a client, you can associate projects with them. This can be done in multiple ways:
- In the Clients Sidebar:
- You can assign a project while creating a new client in the sidebar.
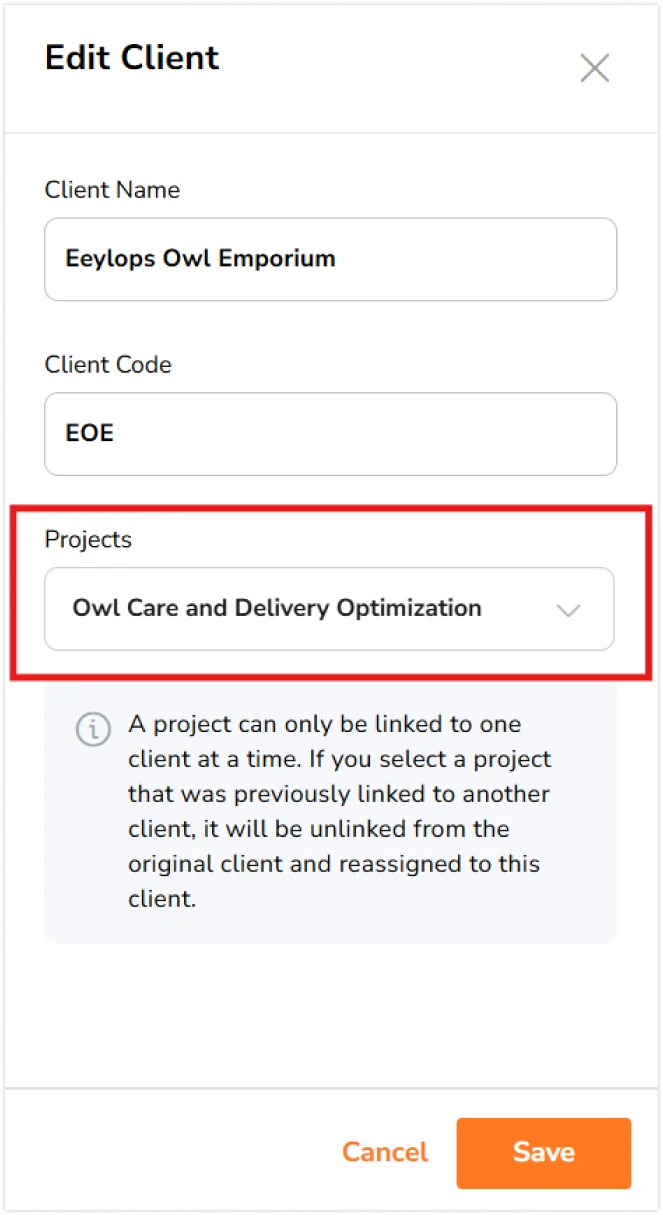
- Alternatively, you can click on the pencil icon to edit an existing client.

- This opens the Client sidebar allowing you to make updates.

- Adding Clients in Projects tab:
- Clients can be assigned in the Projects tab when creating a new project.
- You can also assign clients by clicking on the pencil icon to edit an existing project.

- In this sidebar, you can also create a new client if needed.

Tracking time against a client:
If you need to track time against clients, make sure you assign the client to your project. When your team tracks time against a project, it also tracks the client.
Projects in Timesheets and Reports
Once your team members start to track time against projects, you will have more detailed information about their time spent.
There are two useful areas where you can view this information:
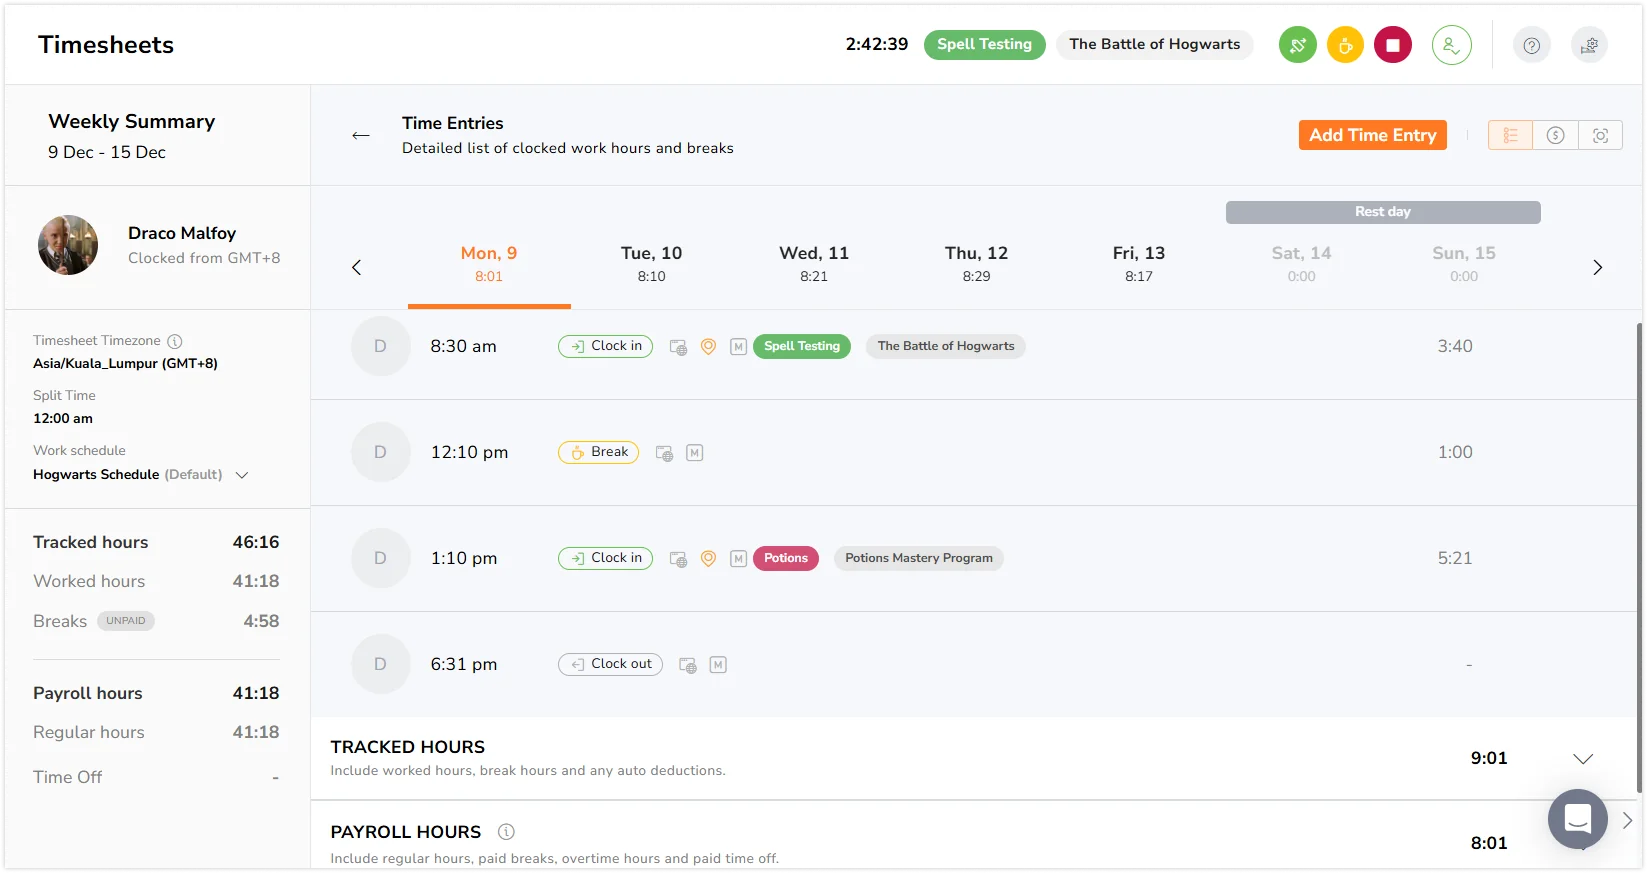
Project Breakdown from Your Team’s Detailed Daily Timesheets
-
Go to Timesheets > Click on the team members’ time > See their detailed daily timesheet.
-
From this page (screenshot above), you can view their time entries with the activity and project clocked.
Tracked Time Report
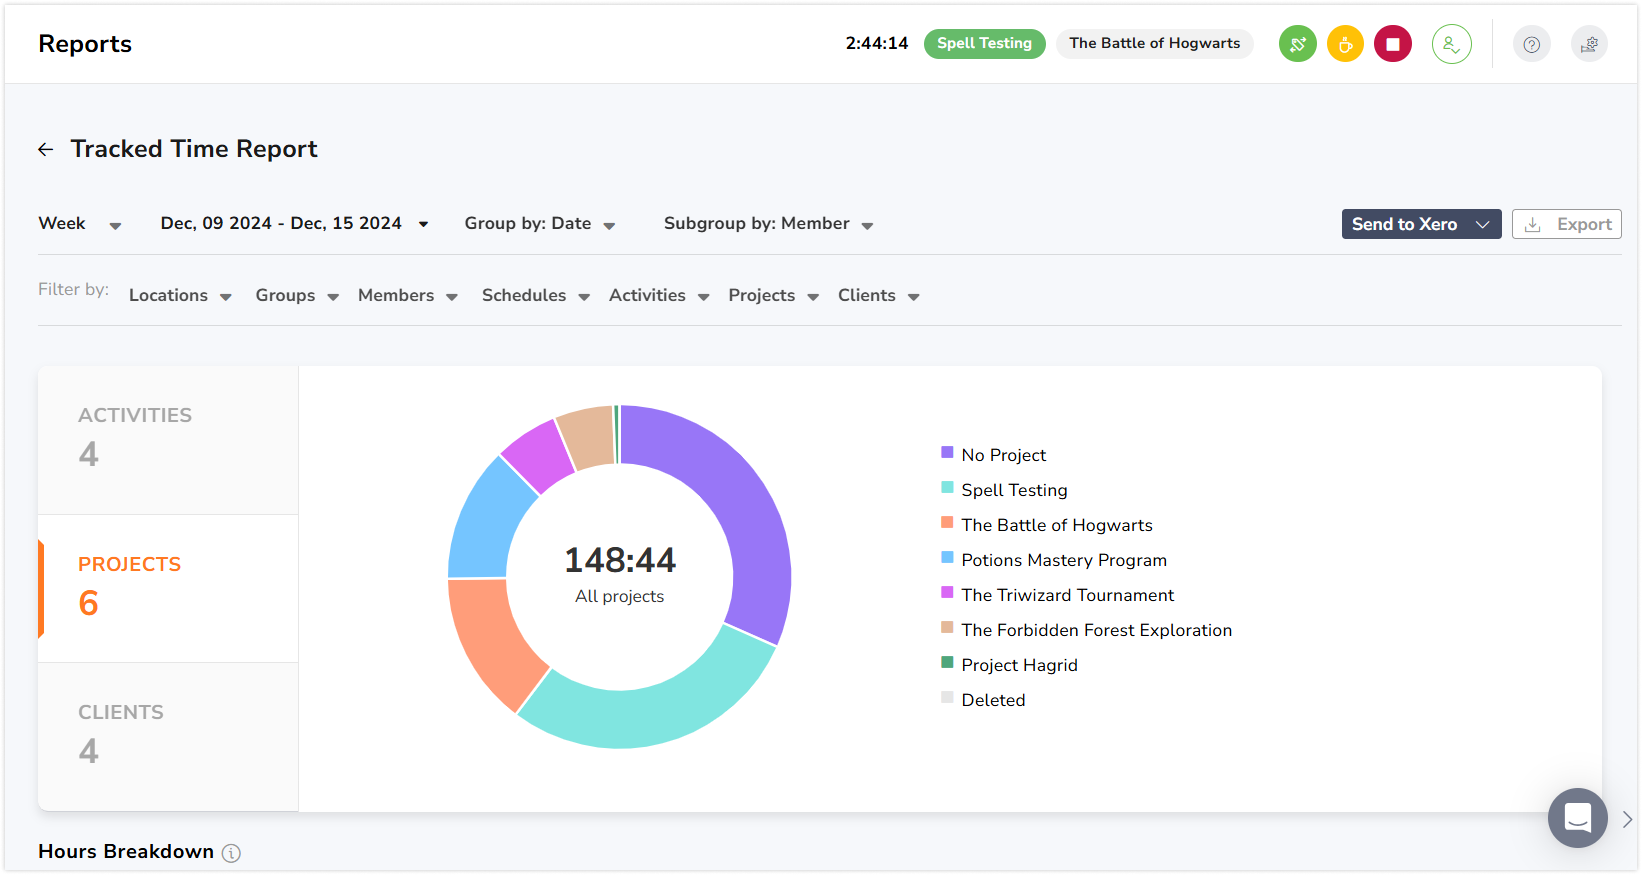
Essential at the end of the month when you need to generate reports for clients. This report helps to provide valuable insights on how your team is tracking time against projects, clients and also activities.
-
Go to Reports.
-
Go to Tracked Time Report.
-
To see your breakdown of projects or clients in hours, click on the tab on the left.
-
You can also see a more detailed breakdown below using group filters.
To filter by group or subgroup:
-
Select if you want to group by Date, Member, Activity, Project, or Client.
-
Select your subgroup: Project, Client, Activity, or Members.
-
See the table breakdown change at the bottom.
To export:
-
You are able to export the tracked time report to view the list of time entries with the breakdown of activities, projects, and client.
-
At the moment, only CSV and Excel files are available. We will introduce the PDF format later in the future.
Read more about setting up activities.

