Setting up activities
Team members can track time against activities for deeper insights and reporting
With activities, your members are able to track time against them so you can generate useful reports for payroll, clients, job costing or work productivity.
This article includes:
- Adding activities
- Assigning activities to groups of people
- Tracking time against activities
- Viewing activities in timesheets and reports
Adding activities
You can create your first set of activities during the onboarding, or add them by going to Activities & Projects > Activities.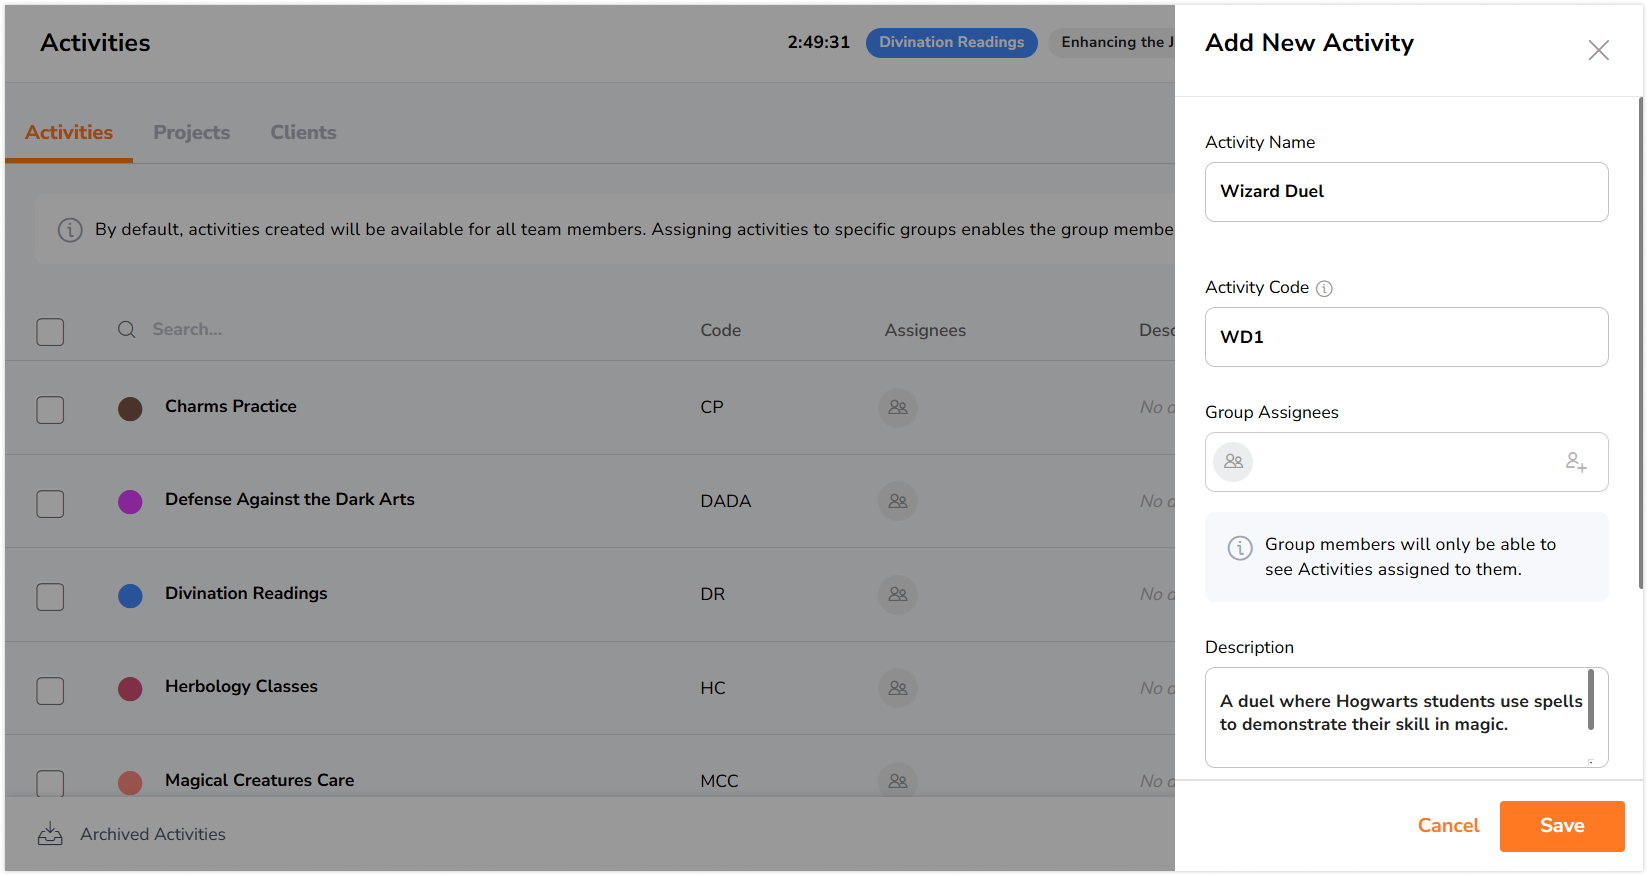
-
In the top right corner click Add Activity.
-
Add the Activity Name (used for clocking in), Activity Code (used for reporting), Group Assignees (to assign the activity to specific groups), and a Description (optional).
-
Hit Save and you’re done! Your team members can now track time on this activity.
Assigning activities to groups of people
By default, everyone can track time on all activities. If you want to restrict your team members to specific tasks (for example sales people should only work on sales tasks), you can do that from the groups settings and Activities tab.
From groups settings:
- Navigate to People and select Groups.
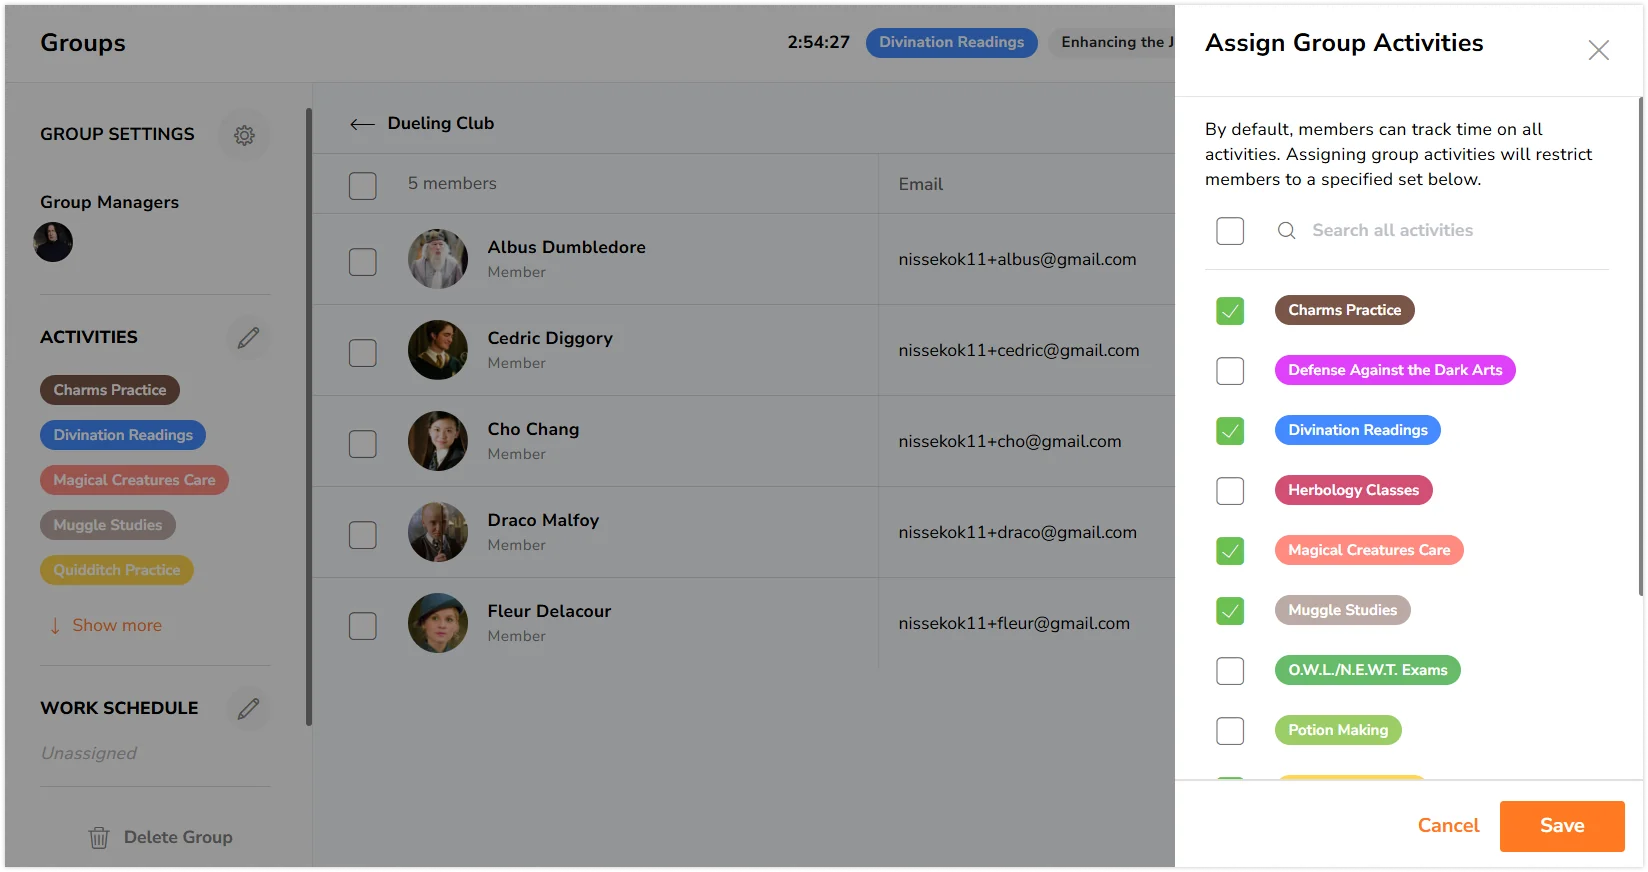
- Select the group you’d like to assign activities to.
- Click the pencil icon to edit the group’s settings.
- Assign the desired activities to the group.
- Click Save.
▶️ Click through to see it in action.
From the Activities tab:
- Go to the Activities & Projects.
- Click on the pencil icon to edit an existing activity, or click Add Activity to create a new one.
- Enter the activity name and code.
- Assign groups to the activity by selecting them under the Groups tab, then click Done.
- And click Save to assign the selected group(s) to the activity.
Once saved, all team members in the group will only be able to track time on the selected activities. Any other activities will be hidden from their view.
Note: If no activities are assigned to a group, members of that group will be able to track time on all activities, with no restrictions on their available options.
▶️ Try the steps yourself below.
Tracking time against activities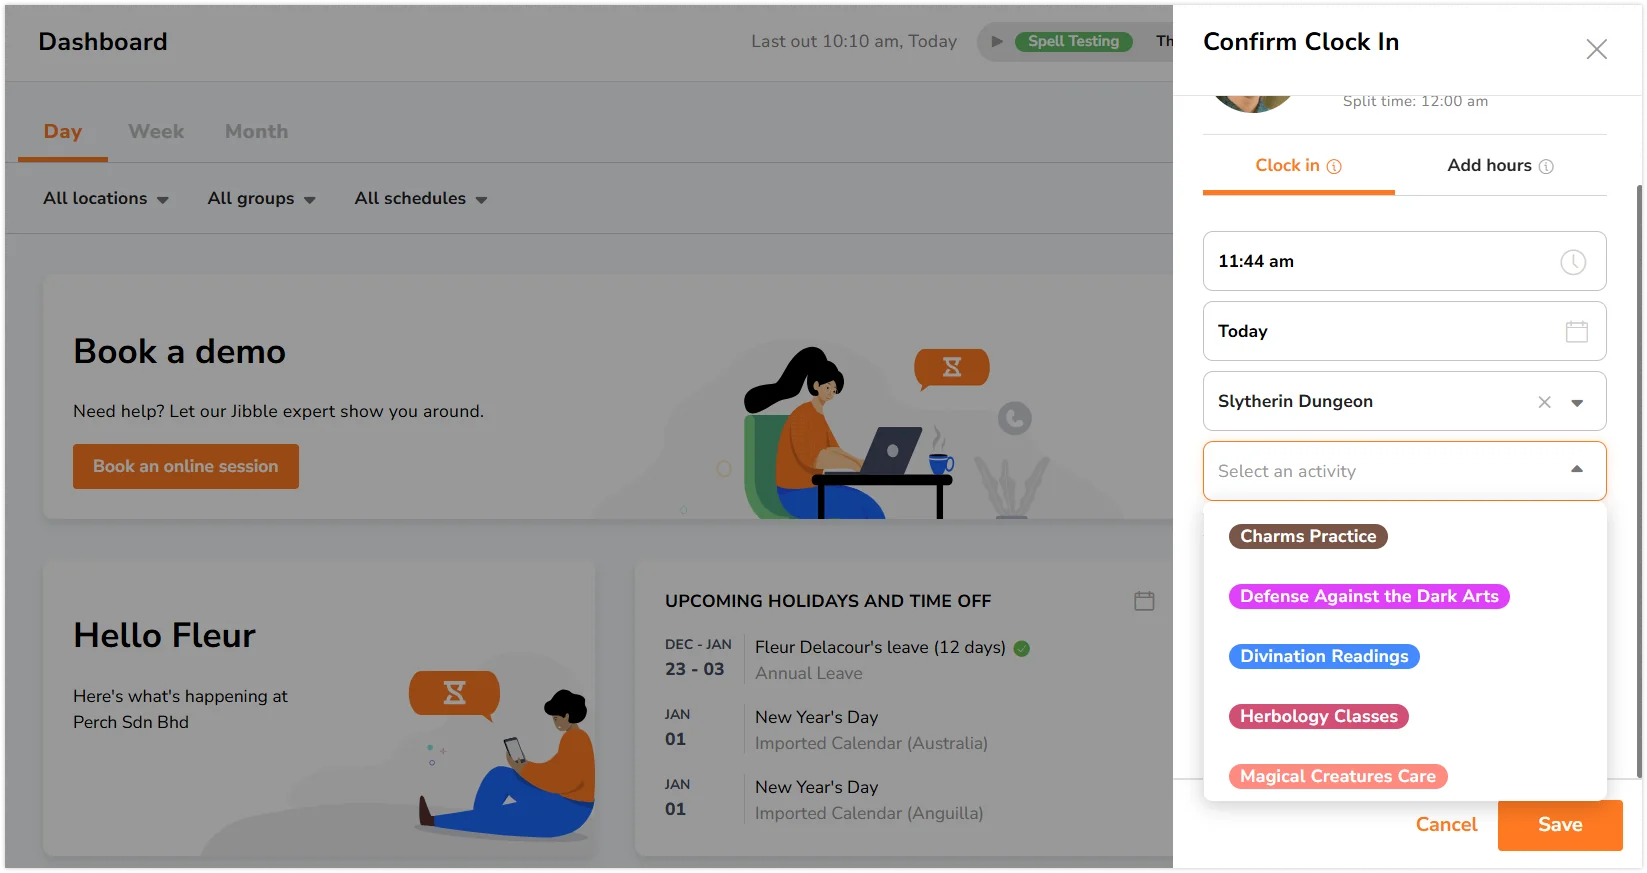
Once you’ve set up different activities, your team members now have the option to select an activity when they clock in. If they switch to a new task they don’t have to clock out, they can simply clock In again on the new activity.
A typical workday could look something like this:
-
8.45 AM: In – Product testing (I start work. My first job the day is product testing.)
-
10.07 AM: In – User testing (I’m done with the first tests and I’m going to start with user testing.)
-
12.29 PM: Start Break (It’s lunchtime!)
-
1.17 PM: In – User testing (End break, back to work.)
-
3.30 PM: Start break (Sleepy! It’s coffee time!)
-
4 PM: In – web development (End break, now I can start working on a new task.)
-
6.13 PM: Out (Done for today.)
Note: You can always adjust the codes that you clock in with, in the Activity Settings.
Viewing activities in timesheets and reports
Once your team members start to track time against activities, you will have more detailed information about their daily, weekly and monthly time spent.
There are two useful areas where you can view this information:
Activity breakdown from employees’ detailed daily timesheets
Go to Timesheets > Click on the team members’ day/time for more details. The timesheet looks like this on the web: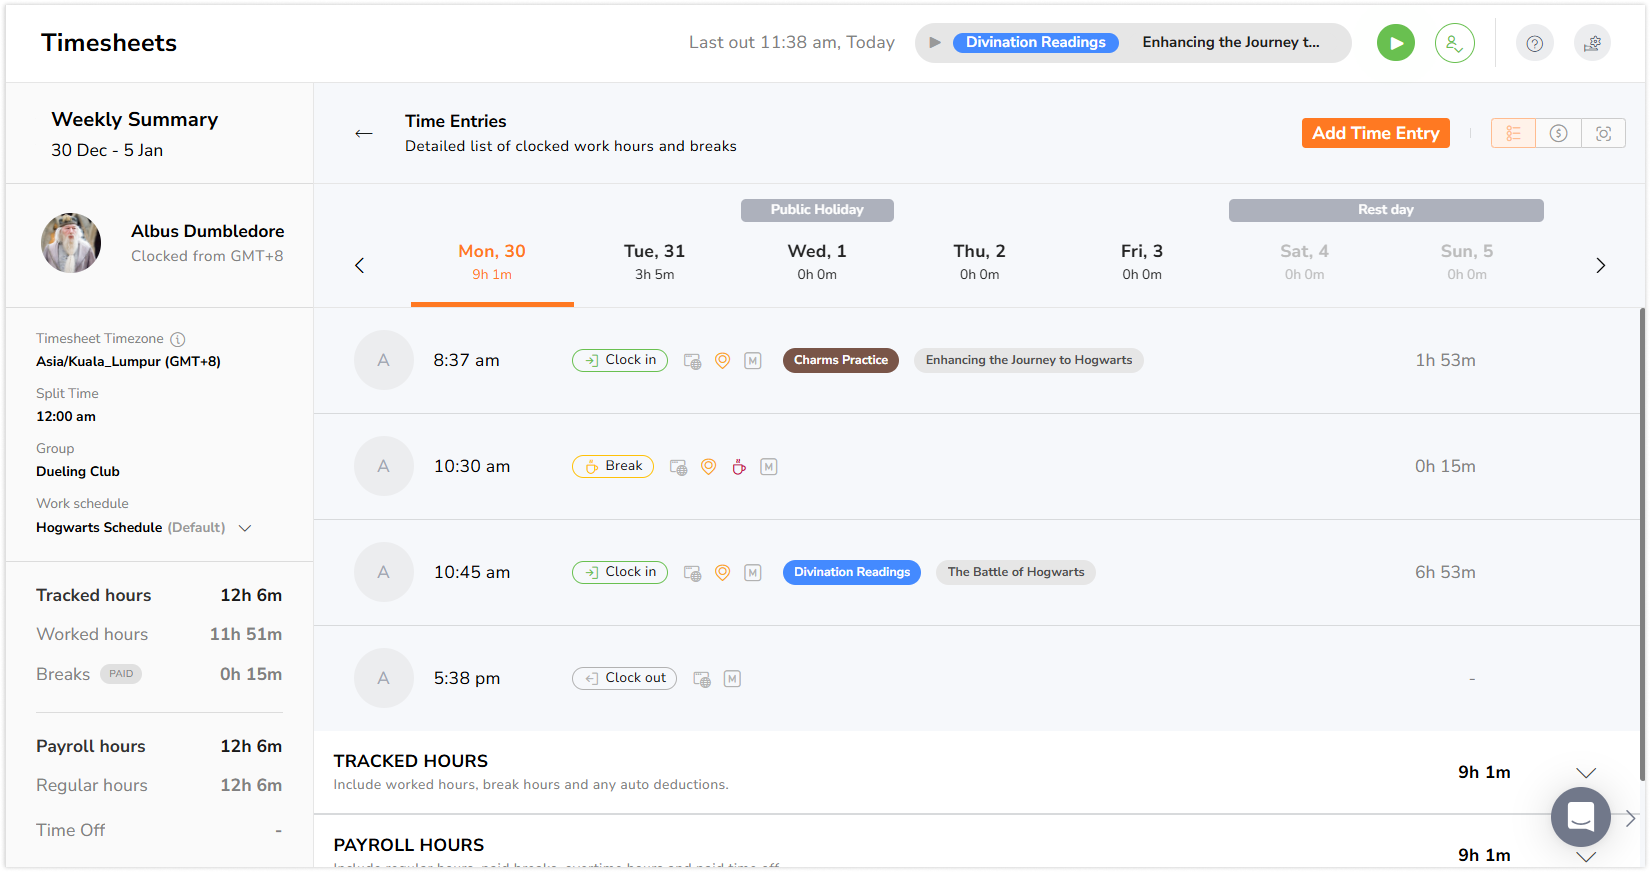
Tracked time reports
Allow you to report on activities, clients, and projects across the whole organization. View the breakdown in three different pie charts.
-
Go to Reports, and select Tracked Time Report.
-
Select the date.
-
Select if you want to group by Date, Member, Project, or Client.
-
Select your subgroup (Activity, Client, or Project).
-
See the table breakdown at the bottom.
▶️ Follow the guide and give it a go.
For more information, read about setting up projects and clients.