Manage work schedules
Setup and manage work schedules for your team to ensure accurate timesheets and payroll calculation
Work Schedules are the backbone of payroll hours in a timesheet software. Once you’ve set up your schedules and holiday calendars, timesheets are powerfully equipped with calculations of breaks, deductions, and overtime to prepare for payroll.
Take note that your timesheets will be recalculated based on any new change made to your work schedule. Find out how timesheets work in Jibble.
The work schedule feature can only be used by team owners & admins.
This article covers:
- Changing work schedule settings
- Creating multiple work schedules
- Work schedule arrangements
- Payroll hours
- Splitting timesheets
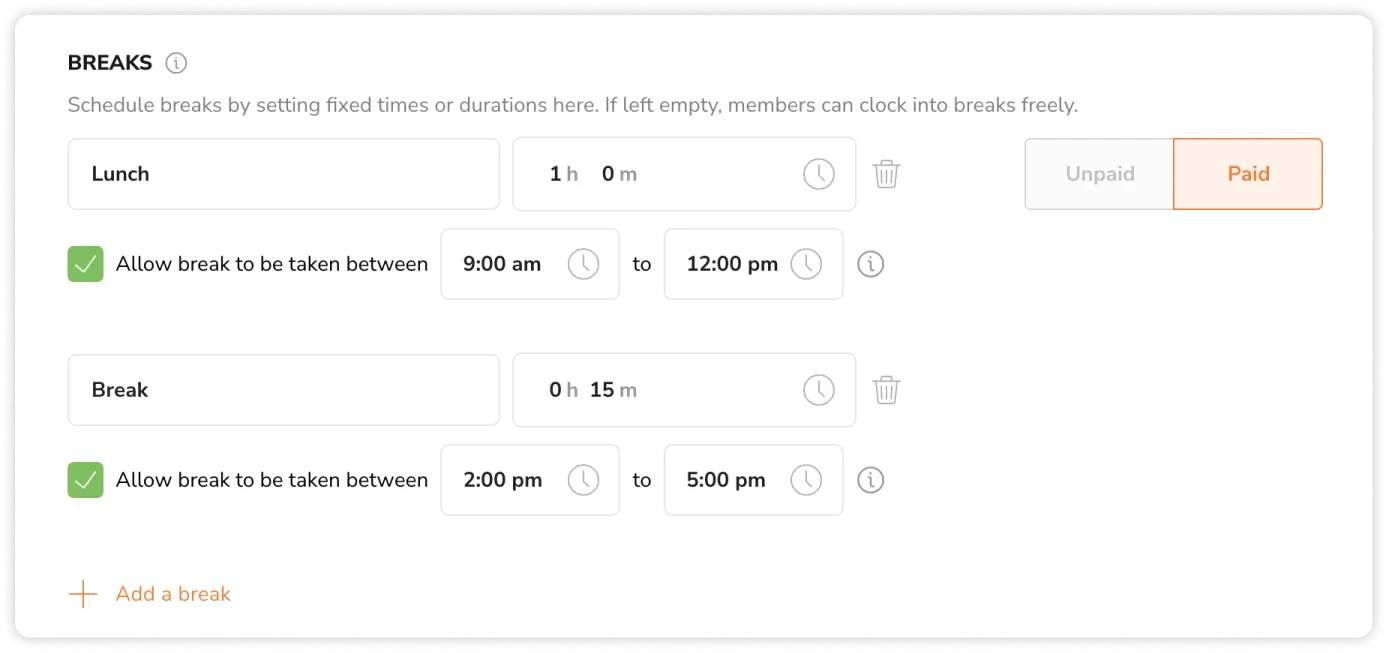
- Custom breaks
- Automatic deductions
- Overtime rules
- Assigning members to schedules
- Assigning locations to schedules
Changing work schedule settings
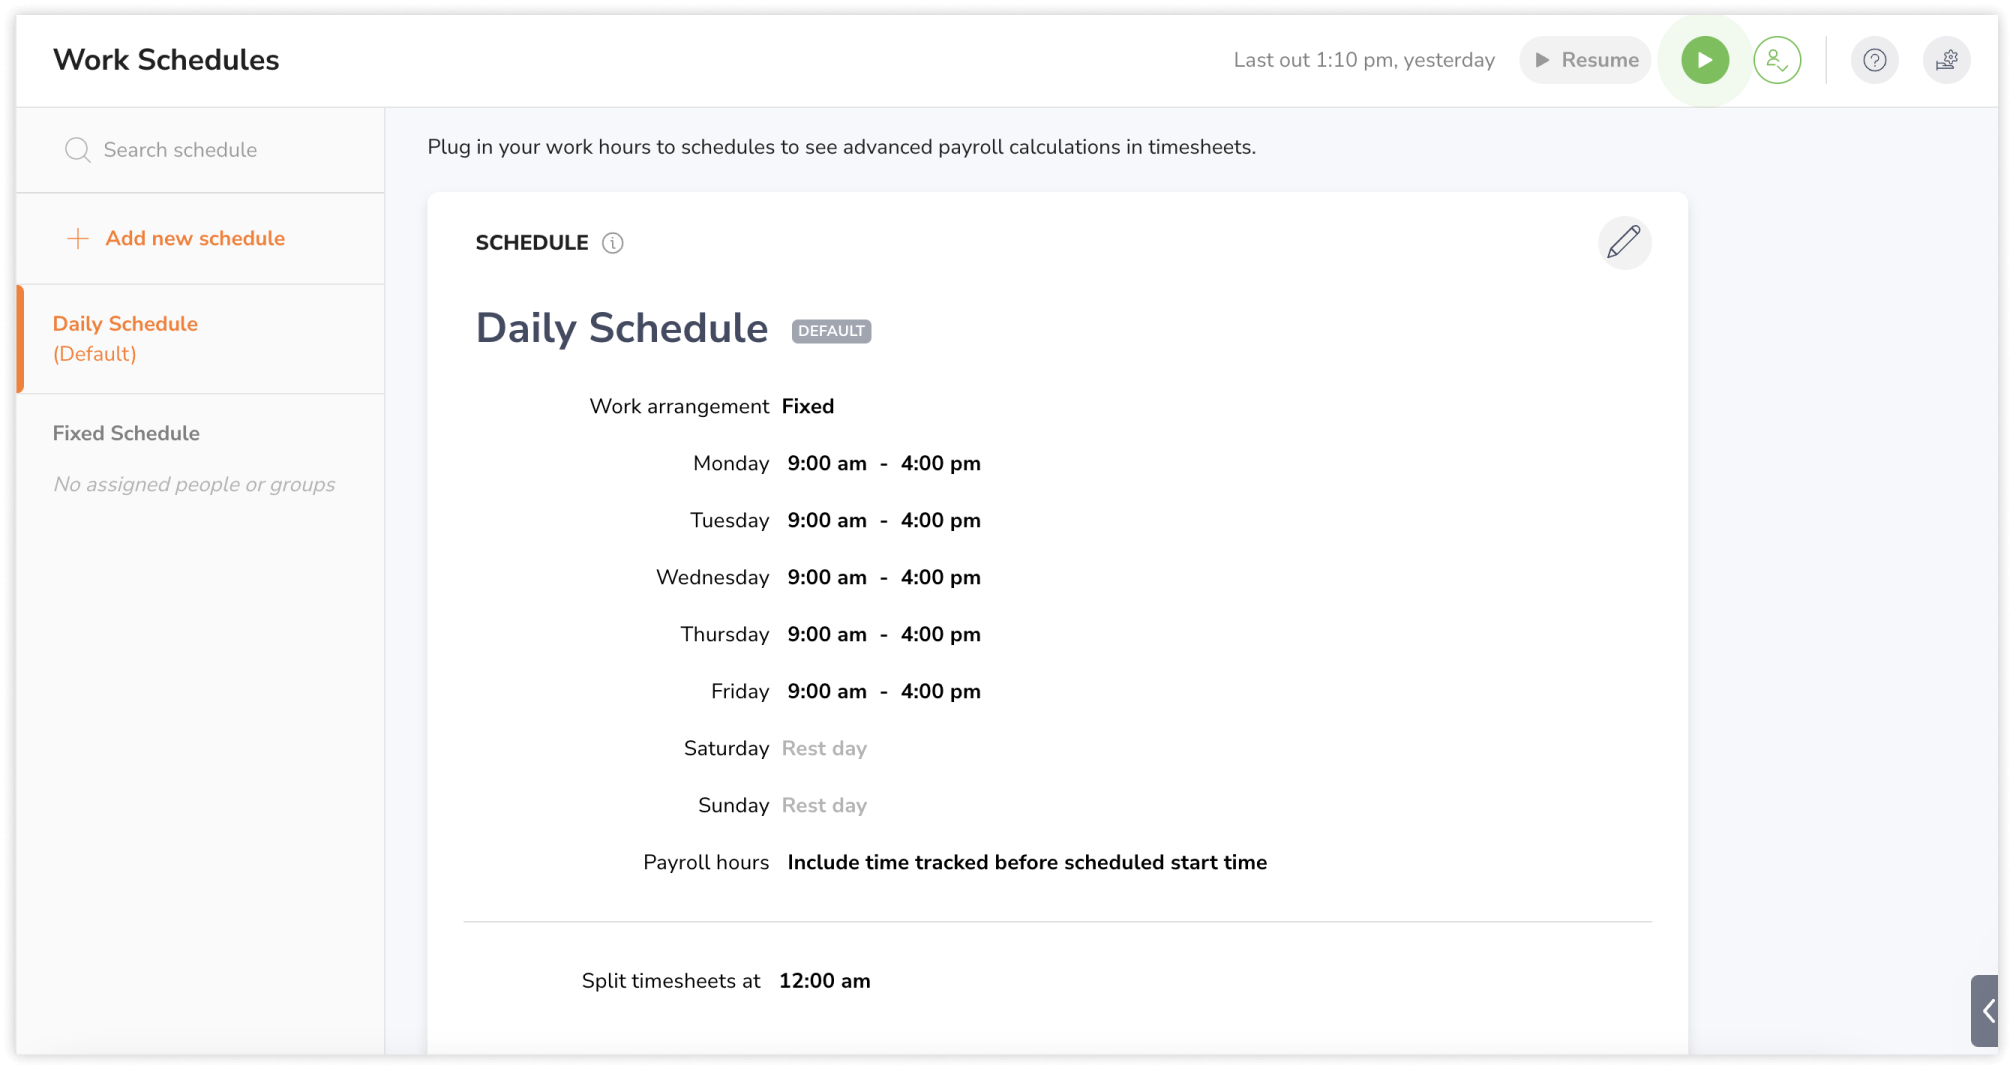
-
Go to Work Schedules.
-
Select a schedule from the left panel.
-
Click on the pencil icon to make changes.
-
Select your preferences.
-
Click the Save button.
Important❗️: Changing your work schedule settings will recalculate all your timesheets to align with the updated changes.
Creating multiple work schedules
You are able to create more than one work schedule for your organization, especially beneficial for larger teams distributed across different regions or countries.
Upon creating these schedules, you must designate a default one. The initial schedule created automatically assumes this default role. Consequently, any new members added will be automatically assigned to this default work schedule.
This principle also applies to default holiday calendars.
Work schedule arrangements
There are three types of work schedule arrangements to choose from:
| Schedule type | Fixed | Flexible | Weekly flexible |
| Description | Days & times are fixed and punctuality is emphasised. | Days are fixed but time is flexible as long as the duration is compliant. | Time is flexible per day as long as the total duration of the week is compliant. |
| Example | Mondays – Fridays from 9:00 am to 5:00 pm | Mondays – Fridays, 8 hours per day | Mondays – Fridays, 40 hours per week |
Note: Days that are not selected as workdays will be taken into consideration when calculating Rest Day Overtime.
Payroll hours
Important❗️: This setting is only applicable for Fixed work schedule arrangements.
You can enable this setting if you wish to include tracked time before the scheduled start time. This means that any time recorded before the set start time will be calculated towards payroll hours.
If you wish to exclude any time tracked before the scheduled start time, you can disable this setting. By default, this checkbox will be enabled.
Example:
- A fixed work schedule is created from 9:00 am – 5pm.
- If an employee worked from 9:00am – 5pm and does not take any breaks, that would add a total of 8 payroll hours.
- If the checkbox is enabled and Jack clocks in at 8:30am, his time tracked before the scheduled start time would be 30 minutes (from 8:30am – 9am). Following this, Jack’s total payroll hours would be calculated as 8 hours 30 minutes.
- If the checkbox is disabled, his total payroll hours would be calculated as 8 hours, excluding the time tracked before 9am.
Splitting timesheets
Important❗️: We only recommend changing this setting if your team works through midnight with night shifts.
By default, days are defined as 24-hour cycles from 00:00 to 23:59. This will affect:
-
How timesheets are displayed
-
Calculation of overtime hours, if rules are configured
Example:
Split timesheets at: 9:00 am-
Daily timesheets will be displayed beginning from 9:00 am (current day) to 8:59 am (the following day)
-
Time entries from 12:00 am to 9:00 am will be recorded on the day before (date-1) instead of the calendar date
For more information, check out our article on adjusting your end workday to split timesheets.
Custom breaks
By default, members can track time on breaks freely. However, you can establish custom breaks to exercise greater control over their duration and timing.
When creating a break, you’ll be required to configure:
| Duration | Determines the length of each break |
| Time slots | Defines the specific times when breaks should be taken |
Paid & Unpaid Breaks
In practice, break times are generally unpaid. However, if you prefer to designate them as paid breaks, you have the option to do so. When opting for paid breaks, the time tracked during breaks will be factored into payroll hours.
Important❗️: The setting of whether a break is paid or unpaid will apply to all custom breaks in a work schedule. You will have to choose between paid or unpaid breaks per work schedule.
Automatic deductions

When an automatic deduction occurs, total tracked hours will be deducted.
When creating a deduction, you’ll have to define:
| Duration | Specific amount of time to deduct from a day |
| Threshold | Minimum daily work duration required for the deduction to be applied. |
Overtime Rules
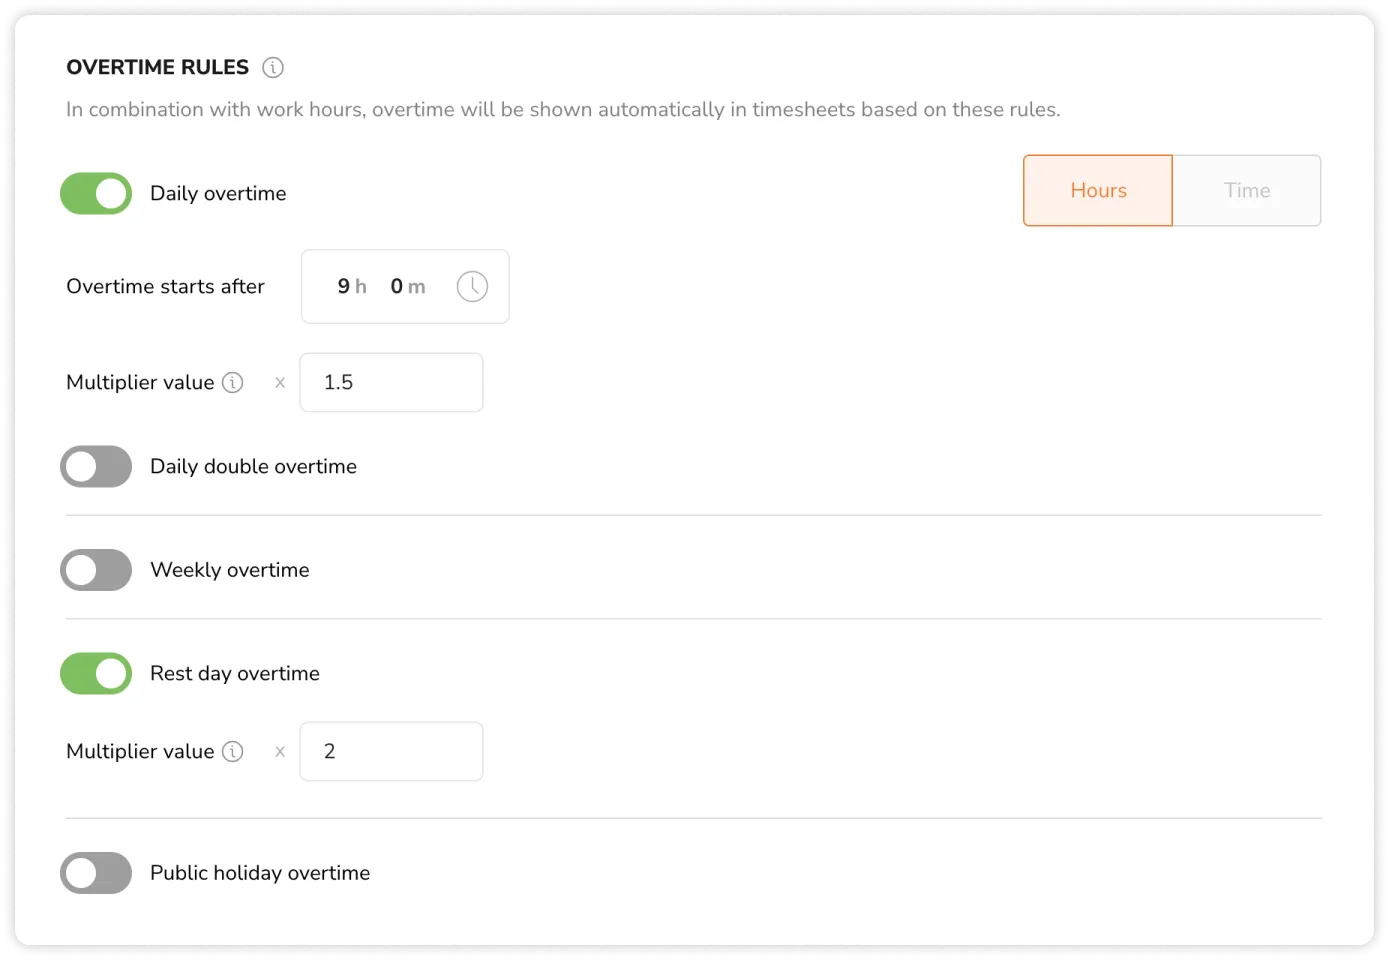
If your organization provides compensation for overtime labor, you can explore the five distinct overtime rules available in Jibble. Additionally, if legal requirements mandate setting an overtime rate for overtime pay, you can find further information on setting up overtime rates.
-
Daily Overtime & Daily Double Overtime
This is the most common type of overtime hours. You can configure them using time or hourly thresholds that reset daily.
Daily double overtime is dependent on daily overtime and can only be enabled if daily overtime is enabled:
-
Daily overtime is any additional regular time tracked beyond the initial threshold but below the second daily double threshold
-
Daily double overtime is any additional regular time tracked beyond the second threshold
If the threshold for daily double overtime is set to a threshold before daily overtime, i.e. double daily overtime starts after 6 hours while daily overtime starts after 8 hours, the double daily overtime threshold will override daily overtime.
| Threshold types | Time | Hours |
| Recommended for | Fixed schedules | Flexible schedules |
| How it works | Beyond the designated time, tracked time will be categorized as overtime | Beyond the designated number of hours, tracked time will be categorized as overtime |
-
Weekly Overtime
Once a specified number of hours have been recorded within a week, any additional regular hours will be classified as weekly overtime. At present, weekly overtime cannot be enabled in conjunction with Daily Overtime, Daily Double Overtime, Rest Day Overtime and Public Holiday Overtime.
By default, a week is considered from Monday to Sunday. You can modify the start day of the week under Organization Settings.
-
Rest Day Overtime
If enabled, any time tracked on a non-working day is considered as rest day overtime.
A rest day is automatically configured if it falls on a day that isn’t chosen as a working day under the work schedule arrangement.
-
Public Holiday Overtime
If enabled, any time tracked on a public holiday is considered as public holiday overtime. Make sure you have holiday calendars set up under Holiday Settings to utilize this rule.
Assigning members to schedules
Upon creating your first schedule, it’s applied automatically to all members.
In the event of multiple schedules, members can be reassigned to a different schedule via the People tab. You’ll have the option to assign members or groups, either individually or in bulk. It’s important to note that each member can belong to only one schedule.
In situations where a group is assigned to one schedule and a member within that group is assigned to another, the individually assigned schedule takes priority. The hierarchy of assignments is as follows:
Individual assignment > Group assignment > Default assignment
Timesheet calculations for each member will align with the work schedule settings they are assigned to. For more information, check out our guide on understanding member assignments.
Assigning locations to schedules
By default, locations are applicable across all schedules, allowing members to track time at any location, regardless of their assigned schedule.
To implement location authorization for members based on their assigned schedules, you may assign specific locations to work schedules.
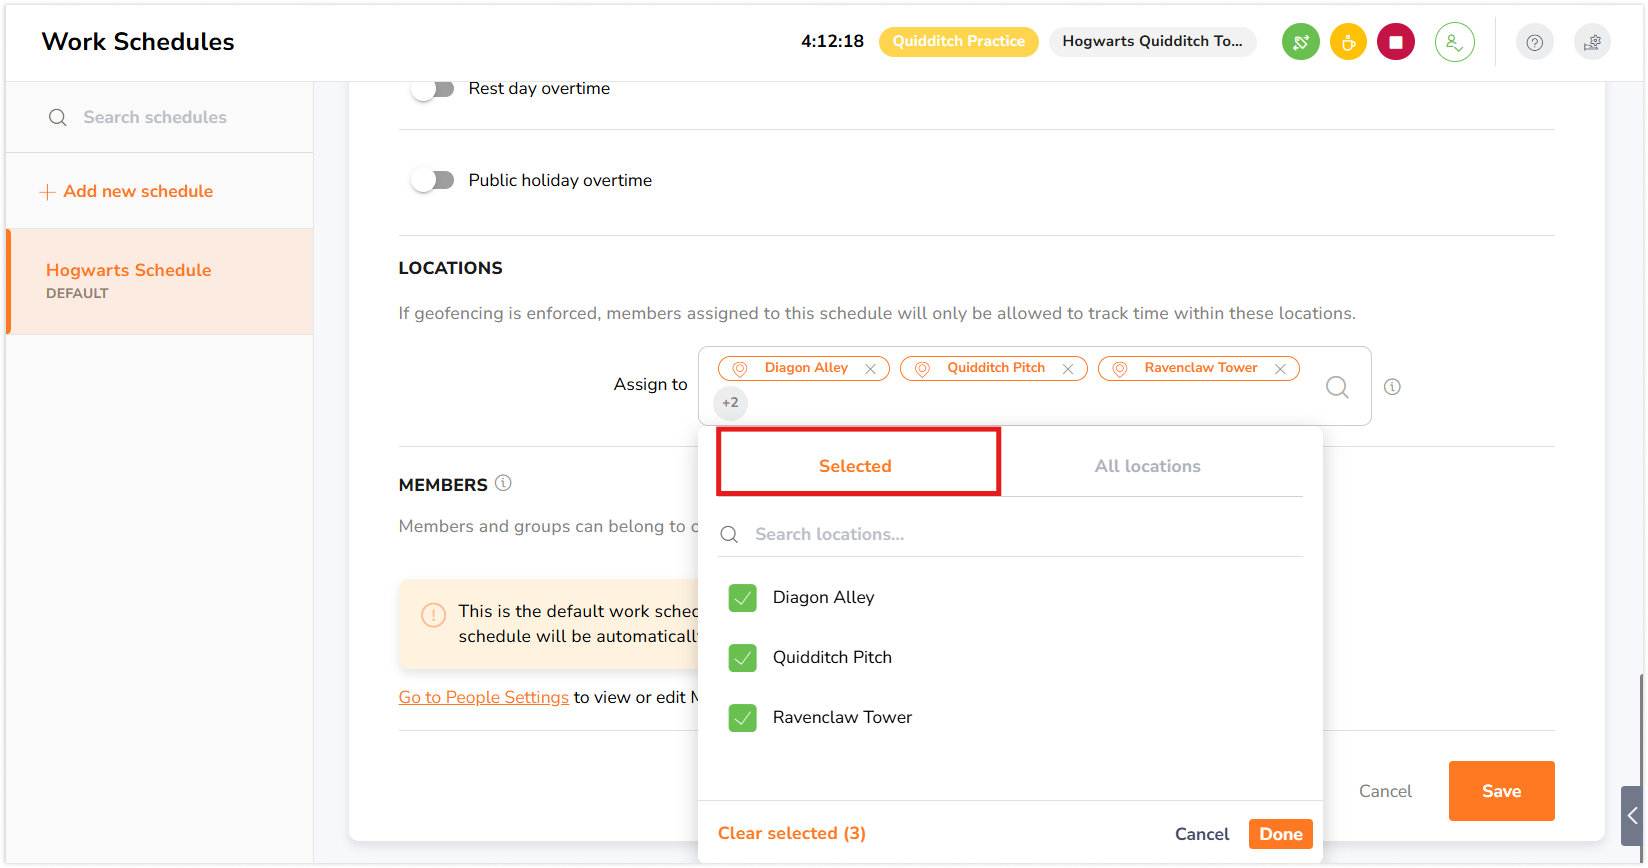
- Click to open the location assignment field.
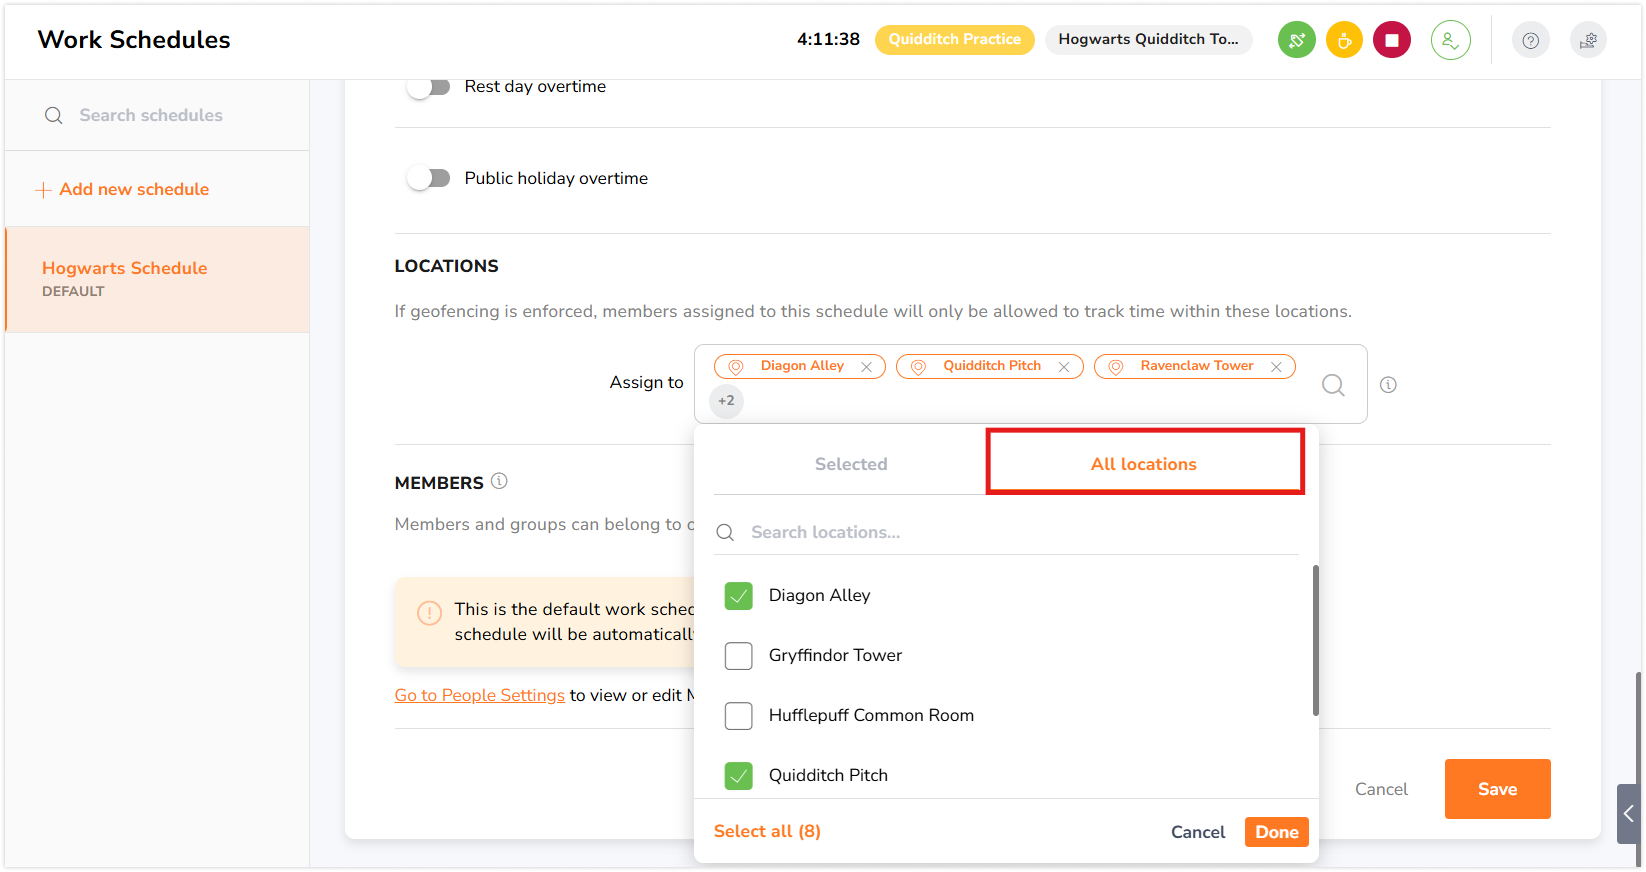
- A pop-up with two tabs will appear:
- Selected: Shows locations currently assigned.
- All locations: Displays all active locations in the organization.
- Selected: Shows locations currently assigned.
- Select locations from All locations. The selected locations will then appear in the Selected tab.
- You can unselect locations from the Selected tab if needed.
- Click Done to save changes.
For more information, check out our guide on managing locations and geofences.


