How to use Jibble’s Kiosk with Guided Access?
Set up guided access to prevent employees from exiting Jibble’s kiosk on your device
Guided Access is a feature available on iOS/iPadOS devices that allows you to limit your device down to a single application. It is an easy method to prevent employees from exiting Jibble’s kiosk and gaining access to sensitive information or important documents on your device.
For more information on setting up a kiosk mode, check out set up Kiosk mode to use your tablet as a shared time clock.
This article covers:
Setting up Guided Access
Once you are ready to set up Guided Access, follow these steps:
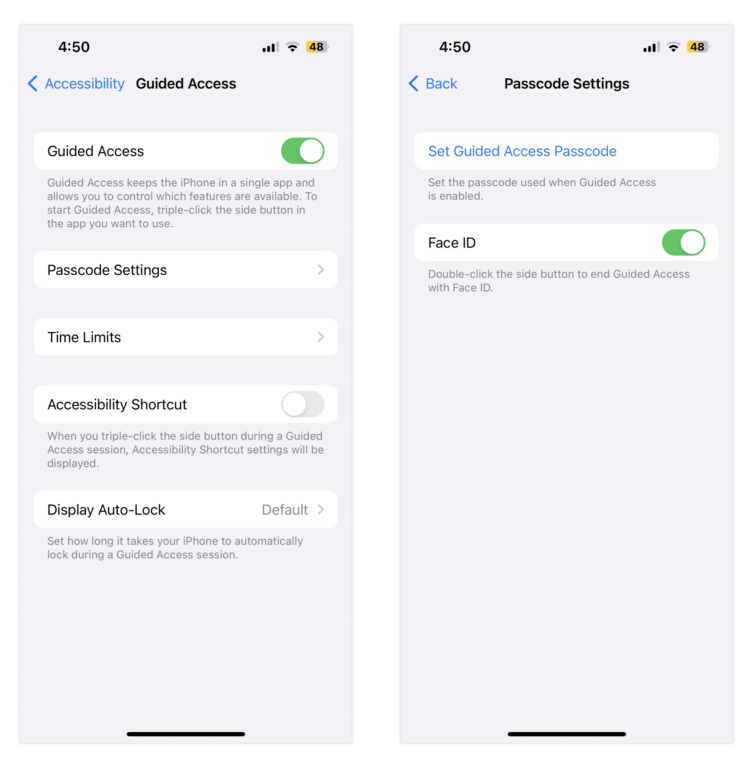
- Go to Settings > Accessibility and tap on Guided Access.
- Slide the toggle to turn Guided Access on.
- Tap Passcode Settings, then click on Set Guided Access Passcode.
- Enter a passcode, then re-enter it.
- You can also enable Face ID or Touch ID as a way to end a Guided Access session.

Note: If you have multiple kiosks running on different iPhones/iPads, you will need to set the Guided Access PIN on each device.
Starting a Guided Access session
- Open Jibble’s Time Tracker app.
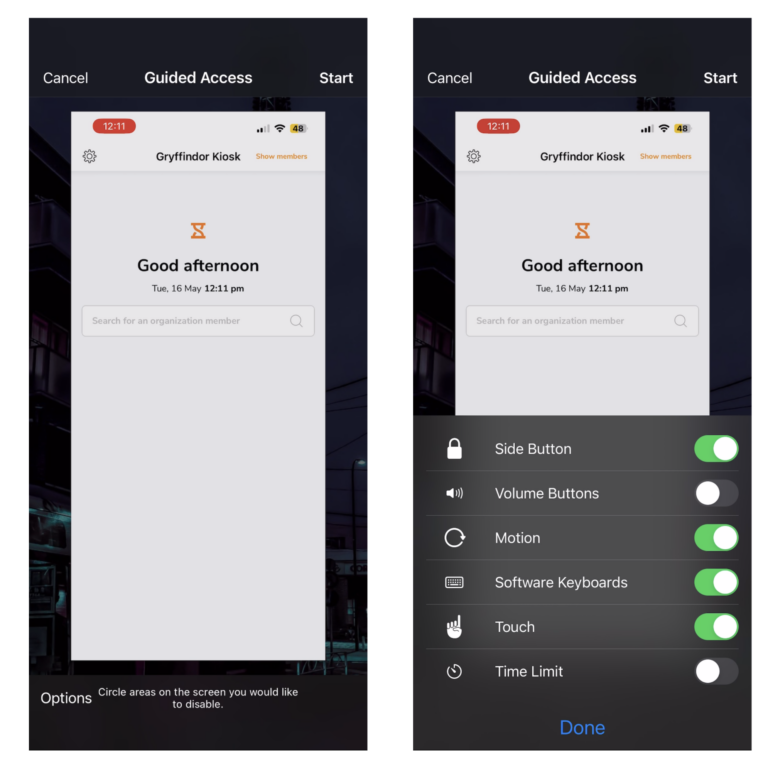
- On an iPhone X or later, triple-click the side button.
- On an iPhone 8 or earlier, triple-click the Home button.
- If you would like the whole screen to be locked, tap on Start.
Note: You can turn features off or set a time limit by clicking on Options, selecting your features and tapping on Done. - If you only want certain parts of your screen to stop responding to touch, use a finger to circle the areas on the screen you would like to disable.
- You can move or resize the circle, or tap on X to remove it.
- Tap Start.

Ending a Guided Access session
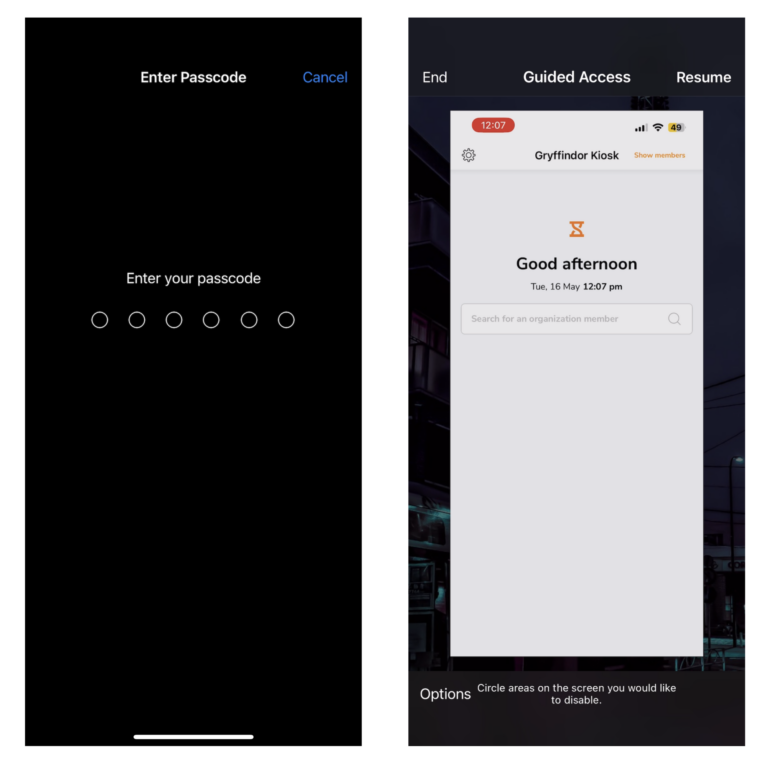
- Triple-click the side button or Home button.
- Enter your Guided Access passcode.
- Tap End.
- If you turned on Face ID or Touch ID for Guided Access, double-click the Side or Home button.

