How to add time entries in bulk on web?
Learn how to add multiple time entries using Jibble’s web app
Jibble’s timesheet app allows you to add time entries in bulk via the web app. Whether you’re dealing with a long list of tasks or need to quickly update several entries, our bulk entry feature is designed to streamline the process.
Check out our article on adding and editing time entries to learn more.
This article covers:
Adding time entries in bulk
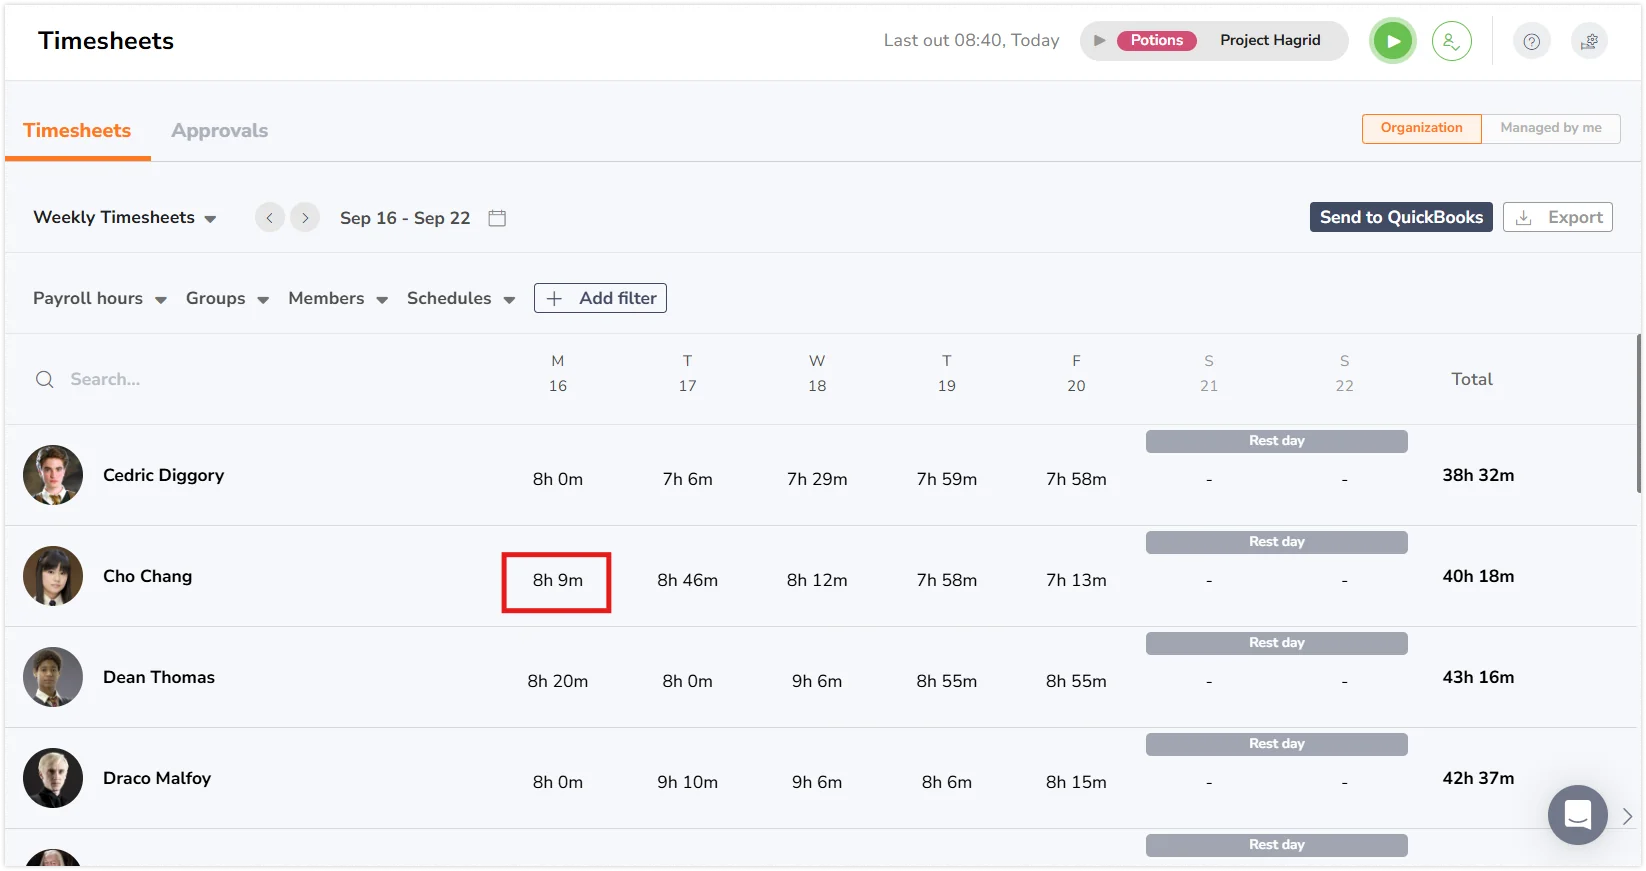
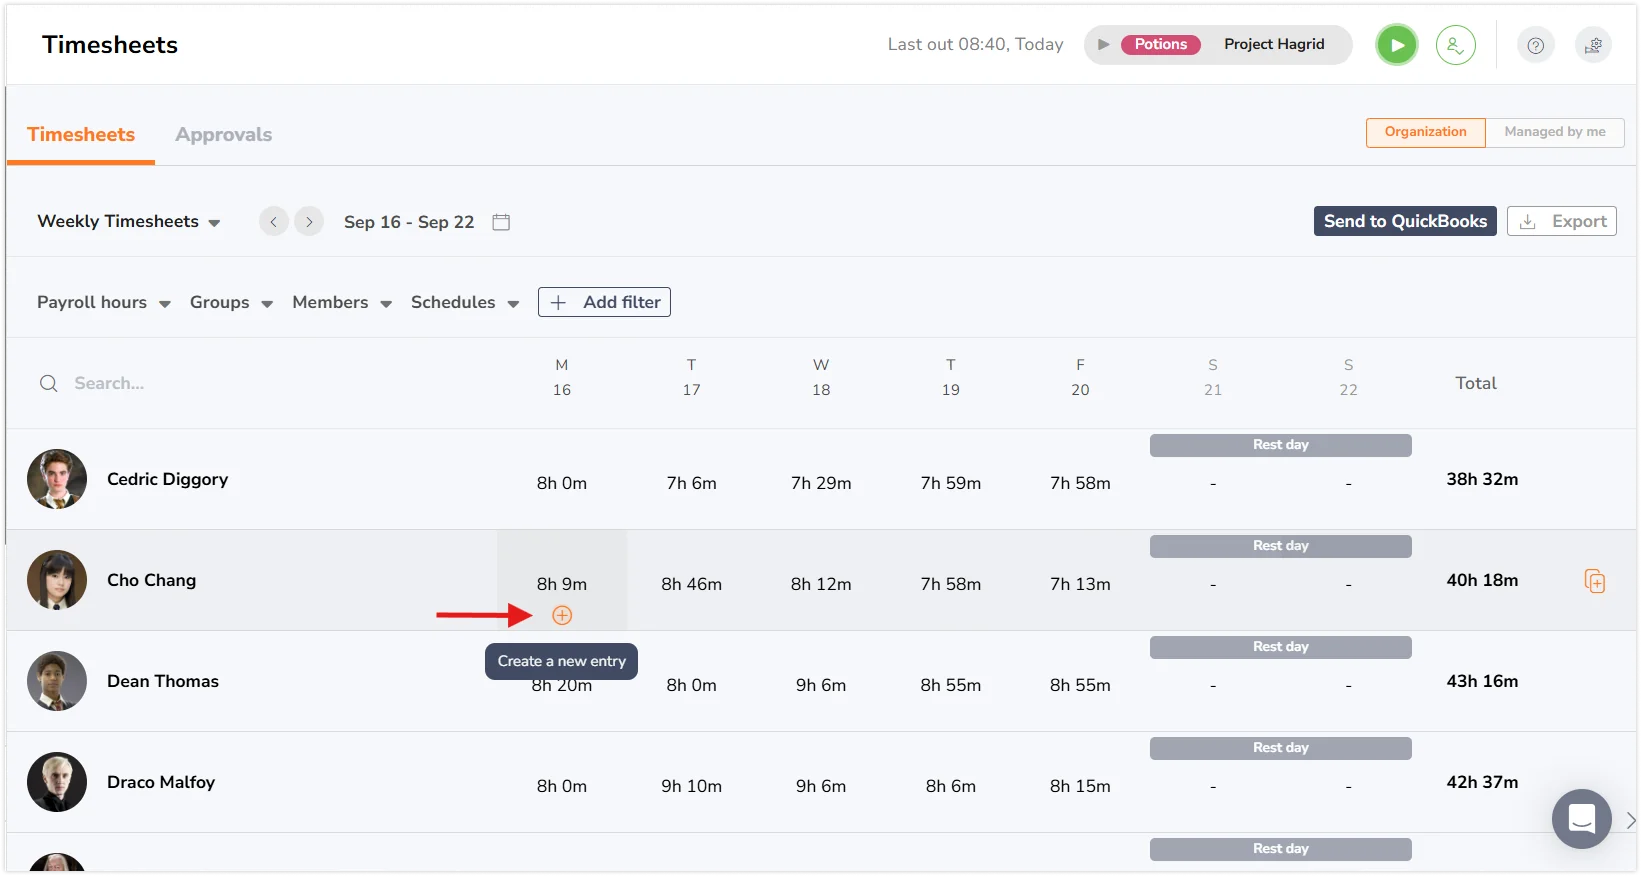
- Go to Timesheets.
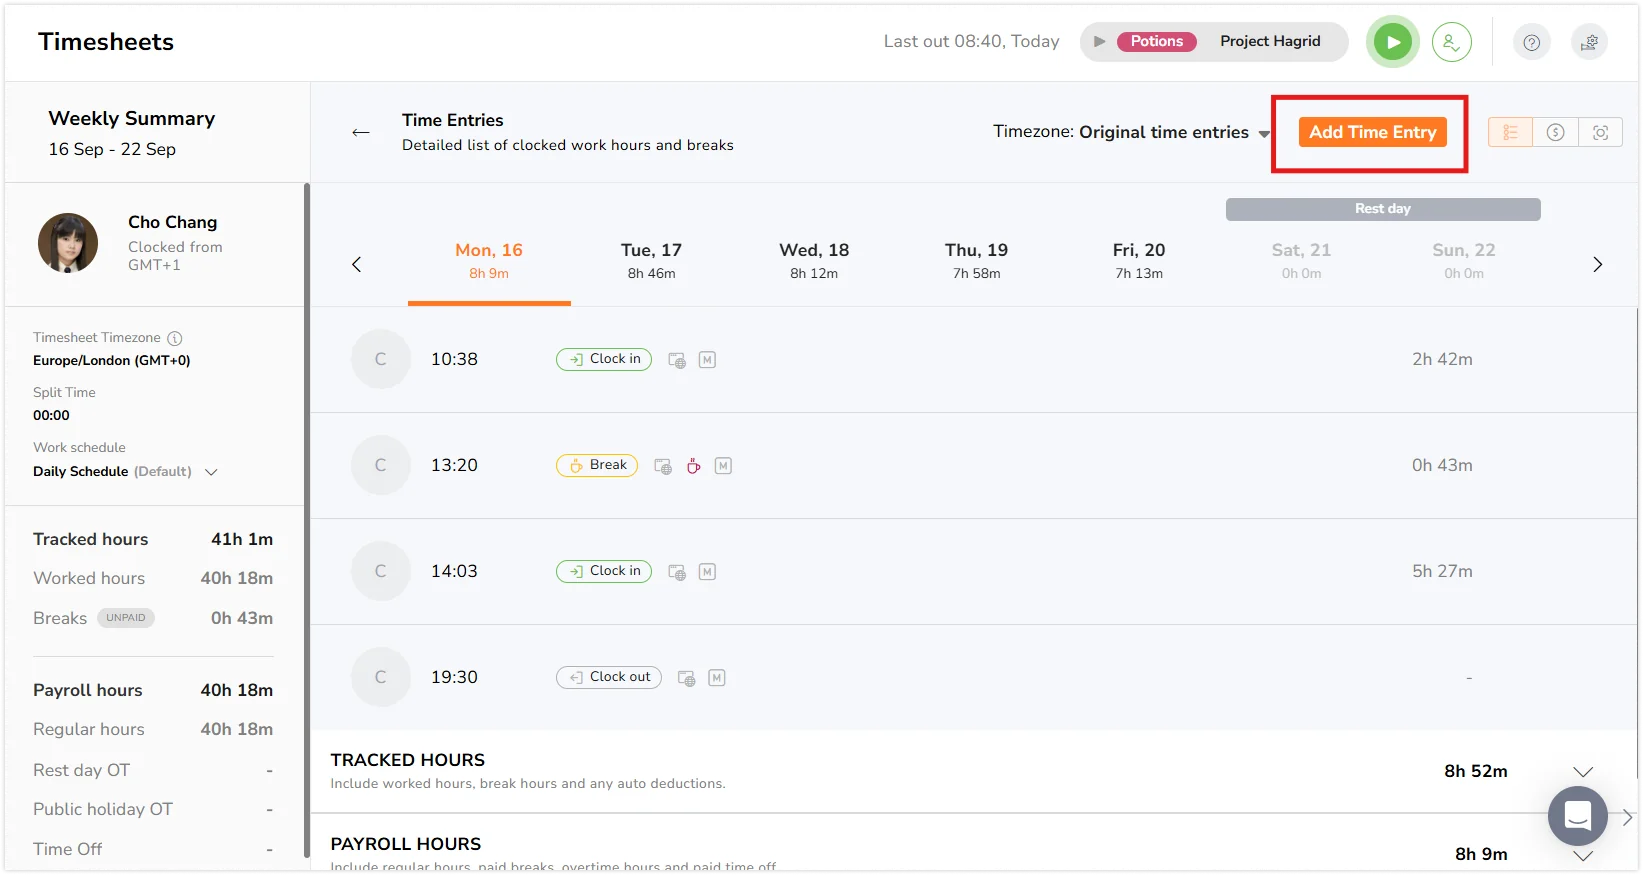
- Hover over the date where you want to add a time entry and click to open the detailed timesheets for that day.

- Click on Add Time Entry.

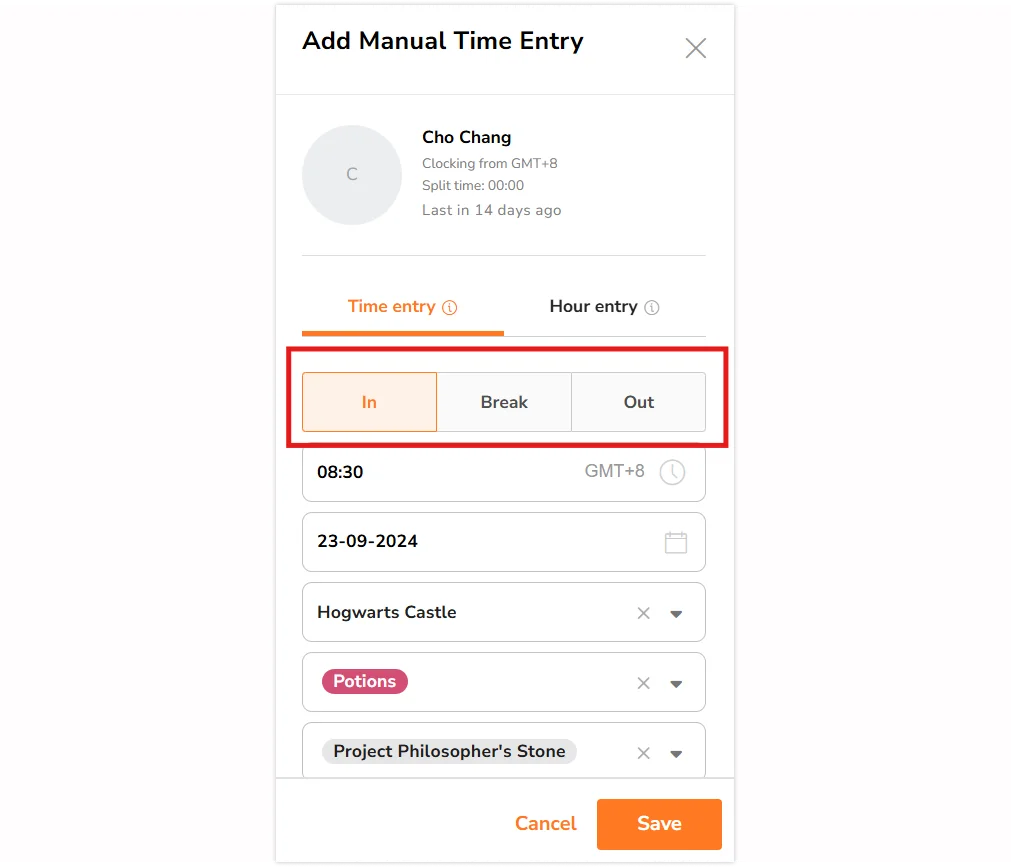
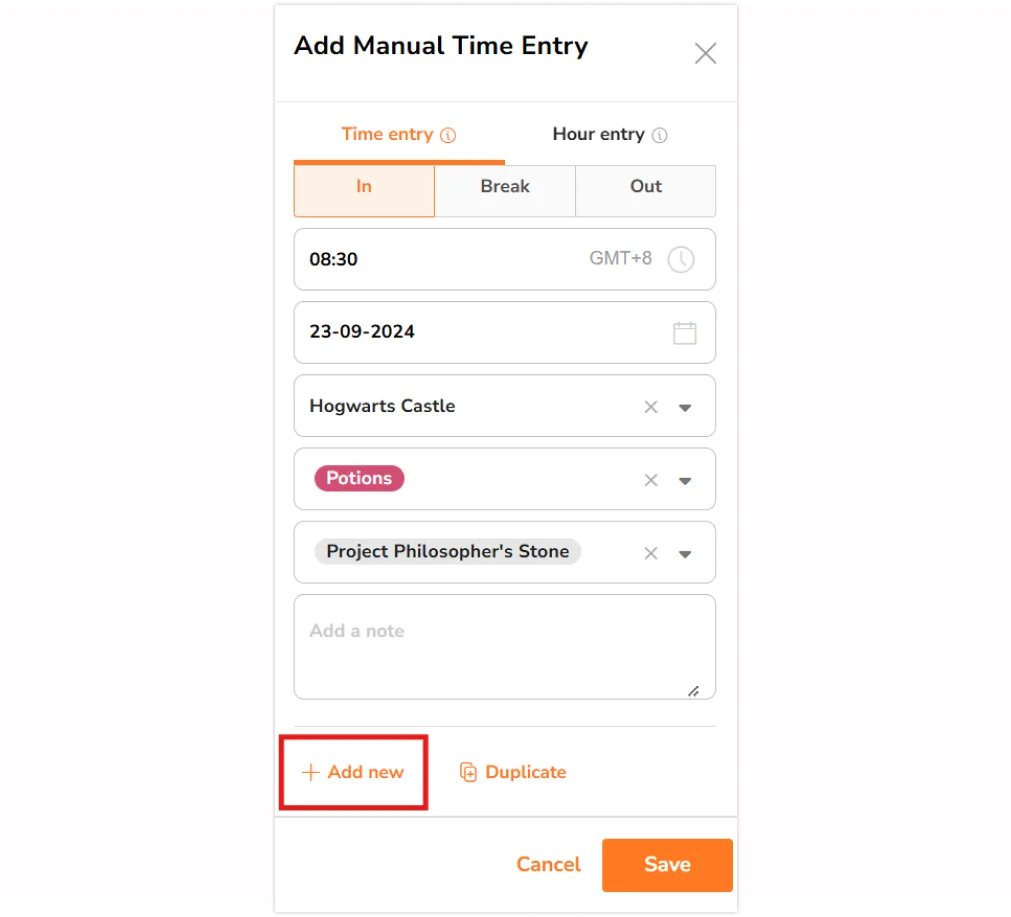
- Select the entry type: In | Break | Out.

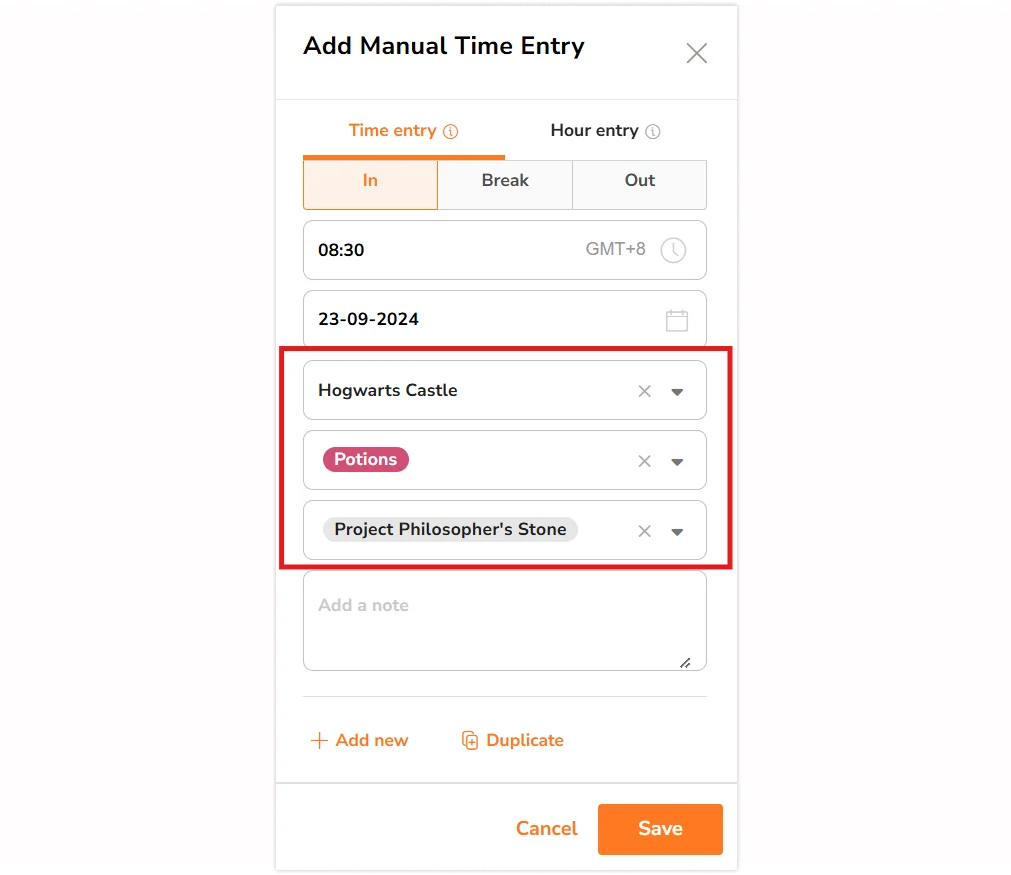
- Fill in the necessary fields like time, location, activity, and project.

- To add another time entry, click on Add new.

- Fill in the entry details as needed.
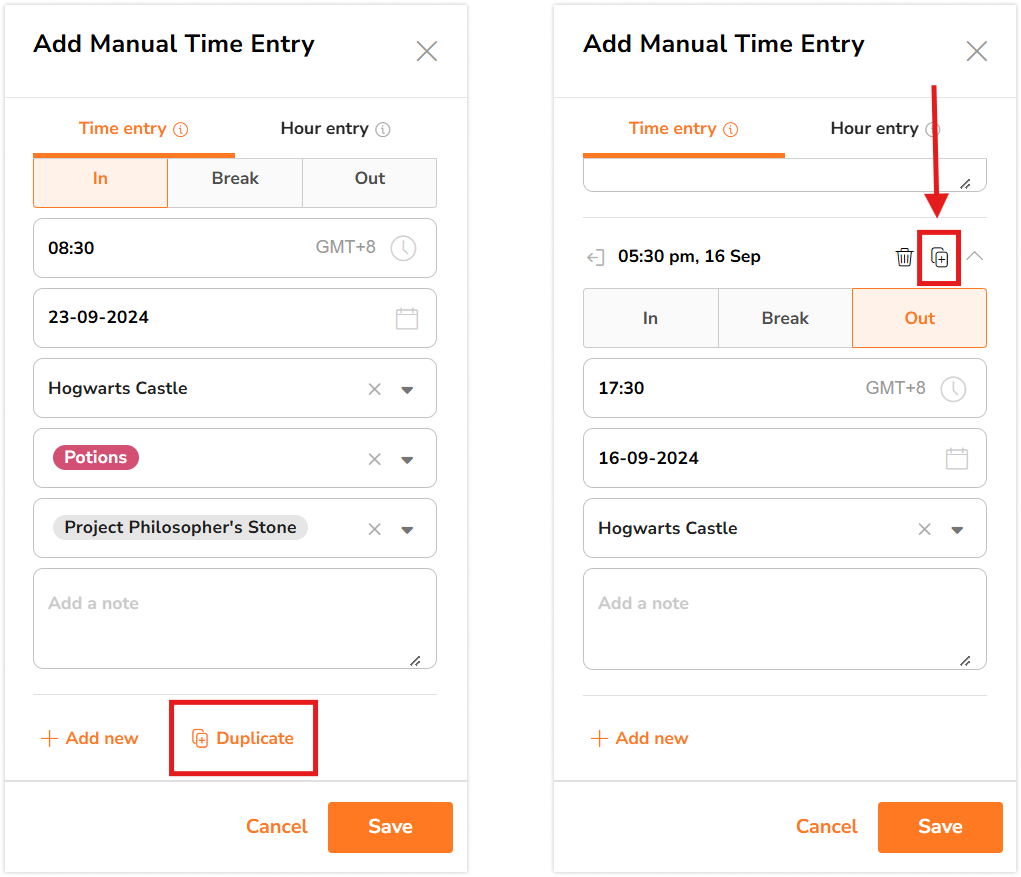
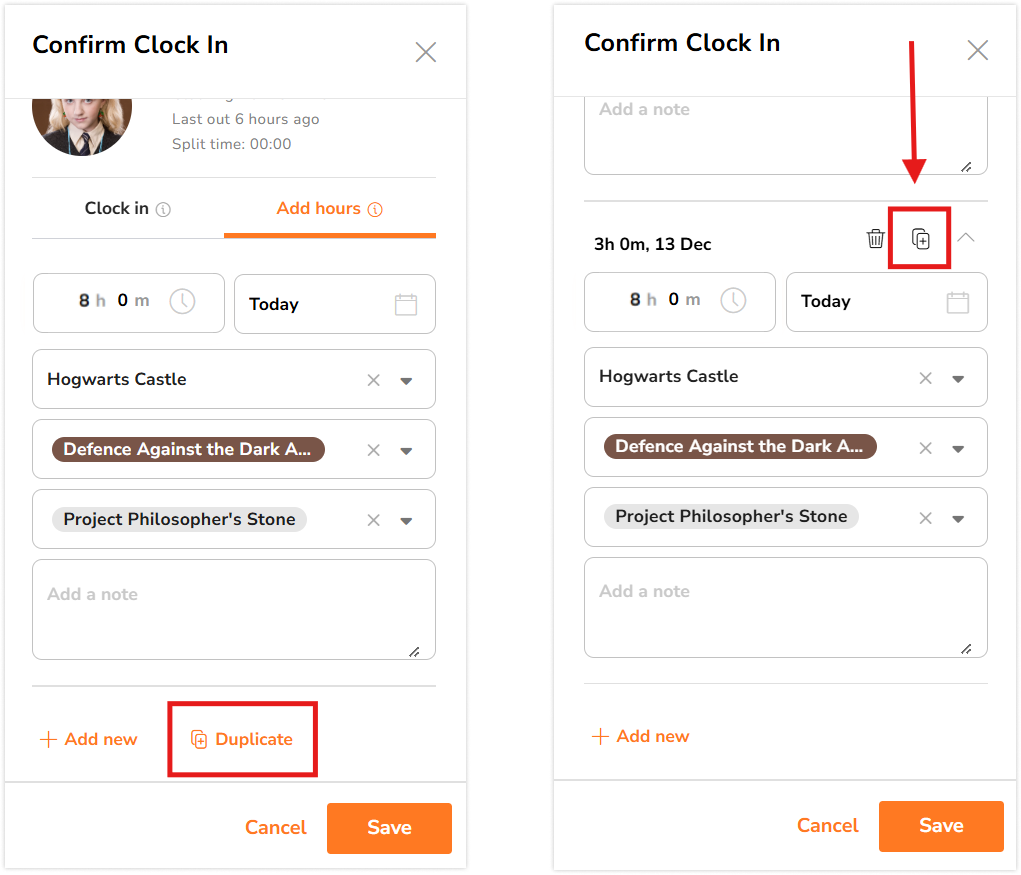
- If you wish to make a copy of an existing entry, click on Duplicate.

- Edit the copied entry’s details to suit your needs.
- Continue adding and duplicating entries to create new time entries.
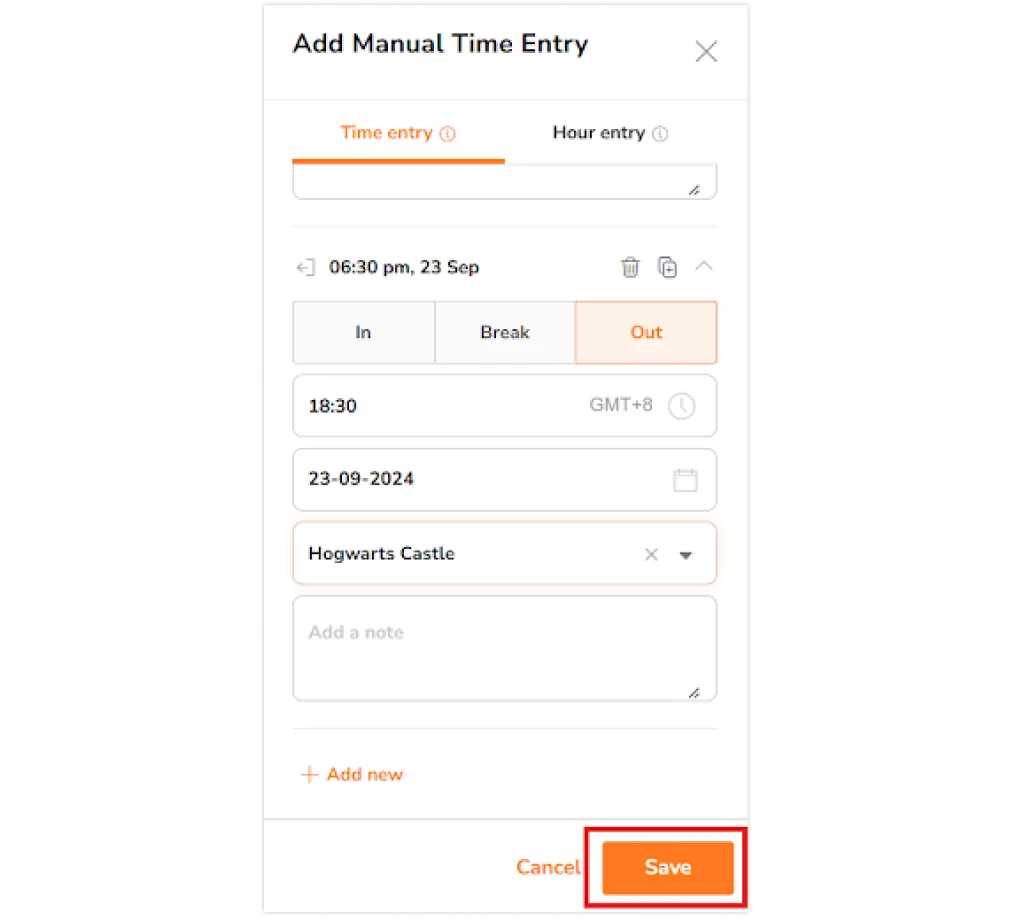
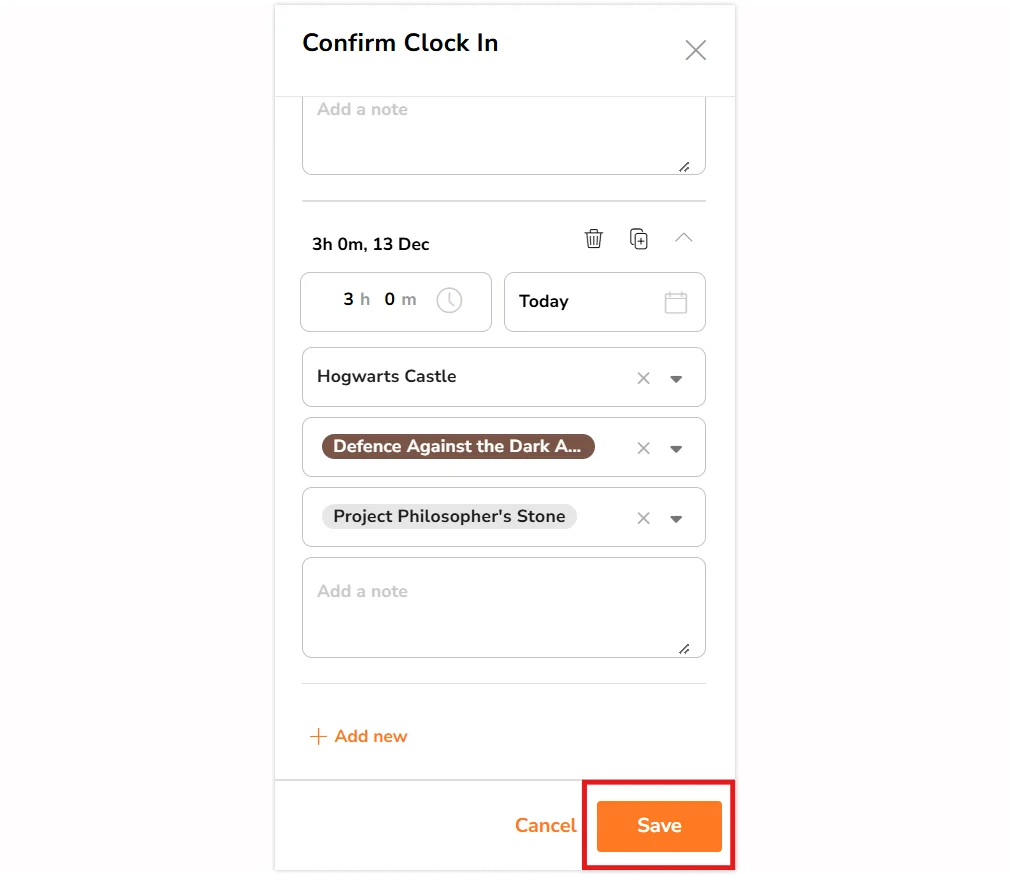
- Once all entries are added, click on Save.

Tips 💡:
- If you have multiple time entries with similar details (e.g., the same activity and project), use the “Duplicate” button.
- After duplicating an entry, you can modify the time, location, activity, project, or other details to fit your specific needs.
- Before submitting your bulk time entries, review the list to ensure all details are accurate.
- If there are conflicting entries in your list, you will see an error message to prompt you to make adjustments.
Adding hour entries in bulk
-
Via timesheets:
- Go to Timesheets.
- Hover over the date where you want to add an hour entry and click on the + icon.

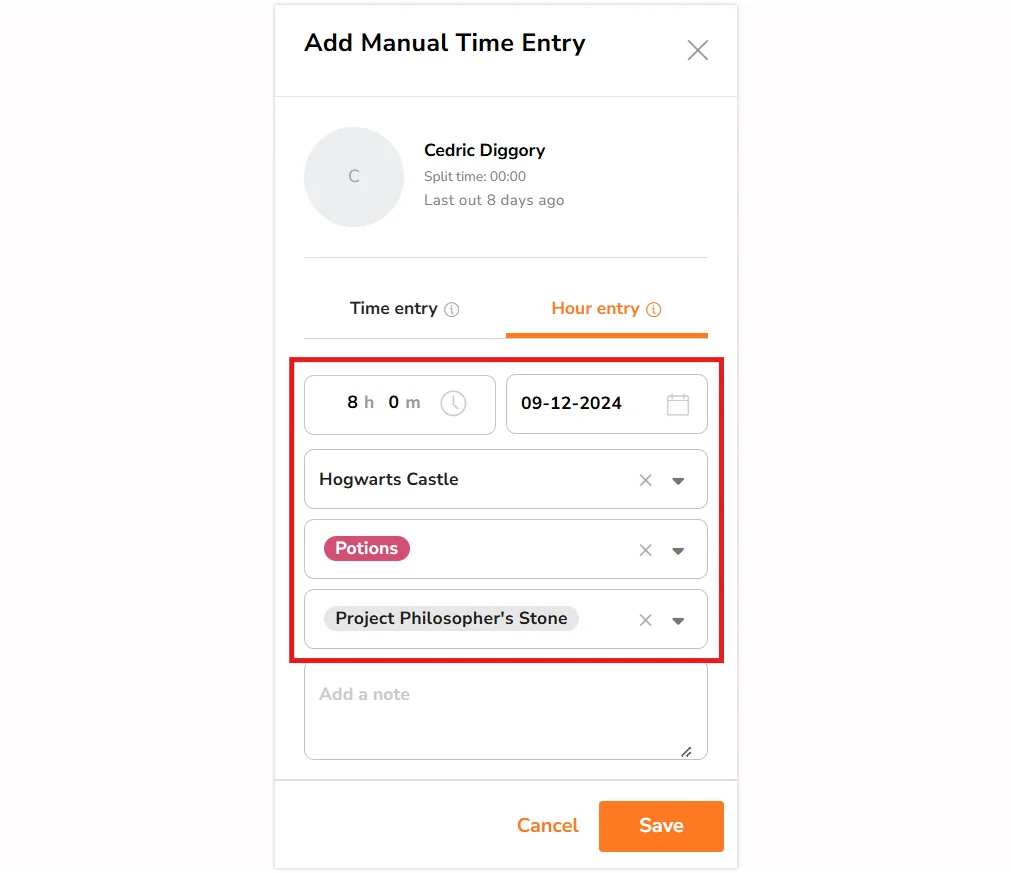
- Enter the duration, activity and project for your entry. You can also add a location and note if needed.

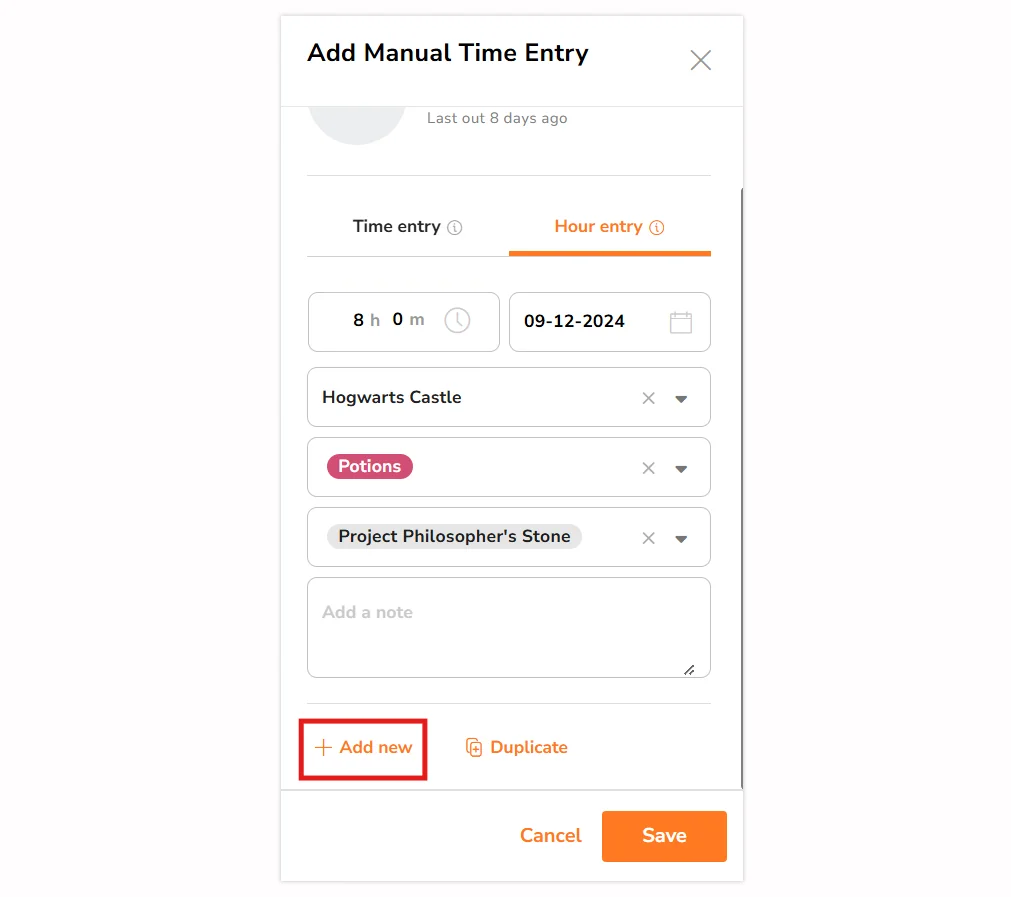
- To add another hour entry, click on Add new and repeat the process.

- Fill in the necessary fields such as duration, location, activity and project if needed.
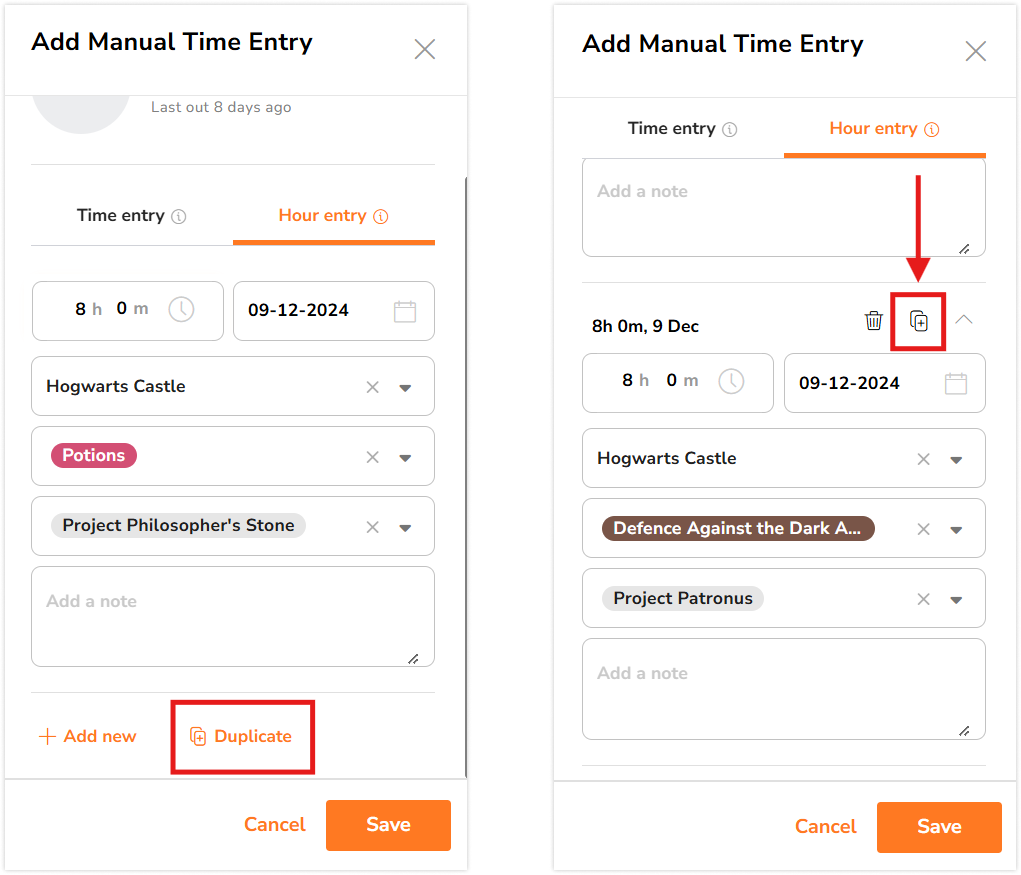
- To copy an existing entry, click on Duplicate.

- Adjust the copied entry’s details as needed.
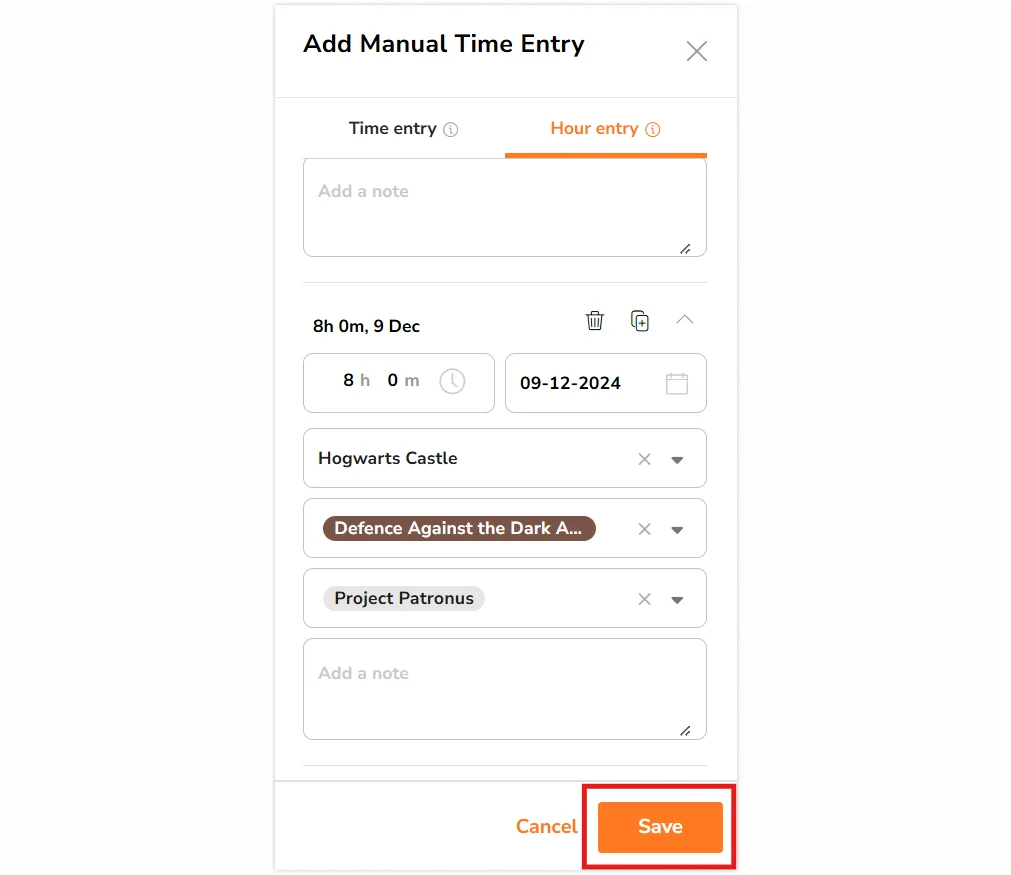
- Once all entries have been created, click on Save.

-
Via clock-in button:
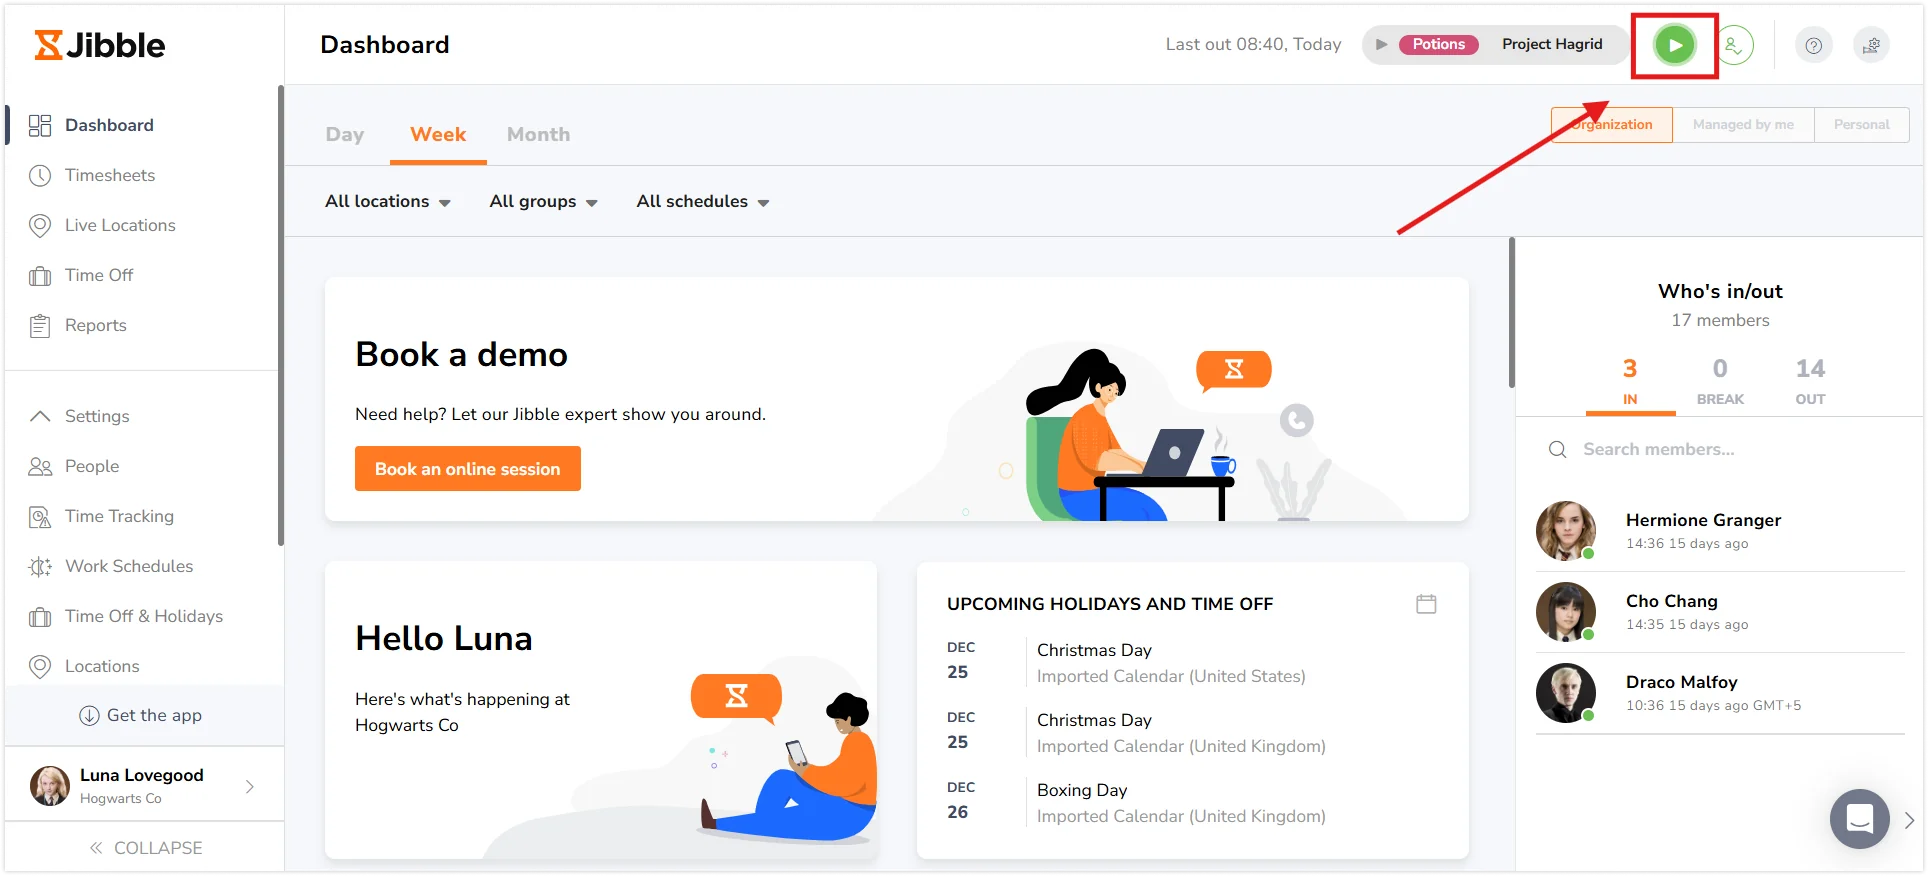
- Alternatively, you can locate the clock-in button at the top of the web app, available on every page.

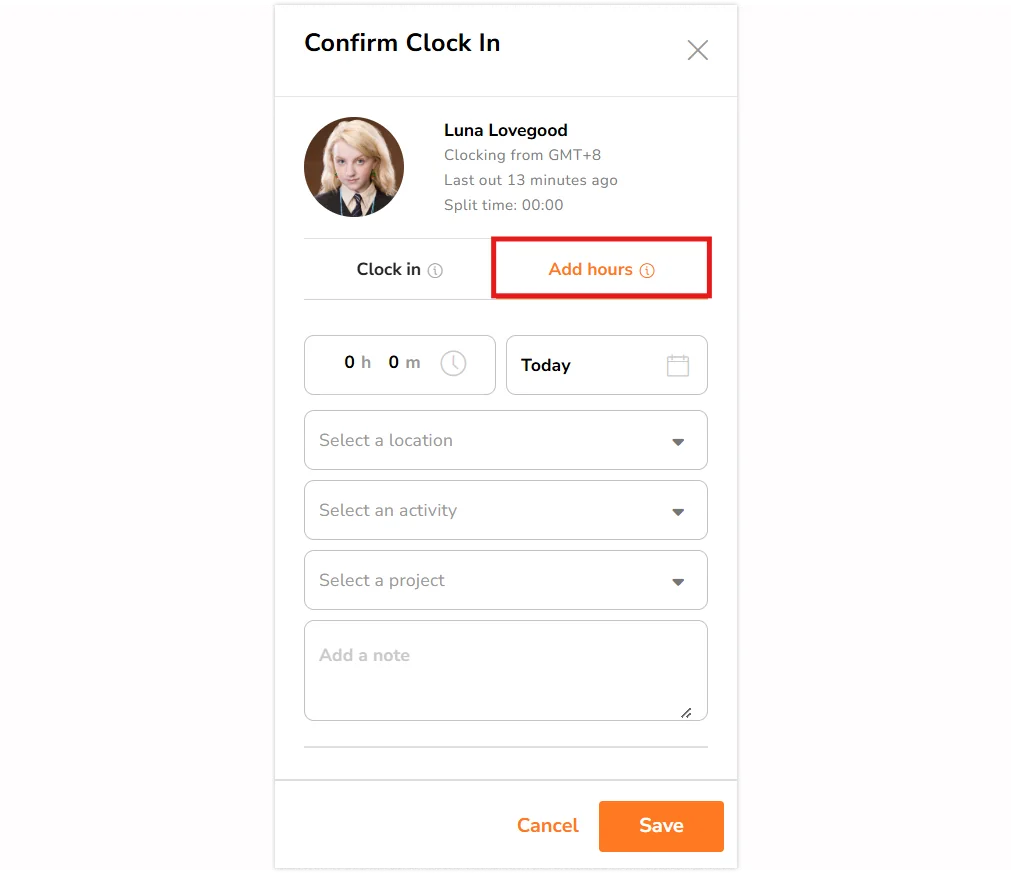
- Click the button and select Add Hours.

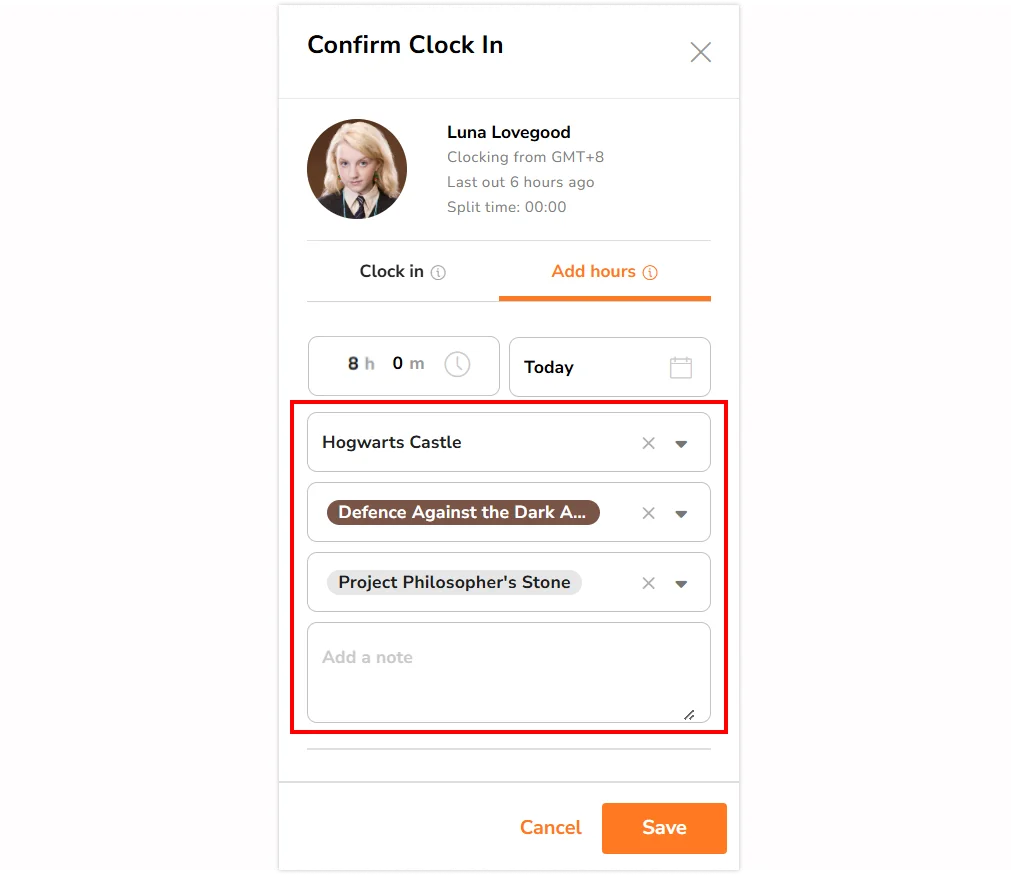
- Fill in the duration, activity, project, location, and any relevant notes for your hour entry.

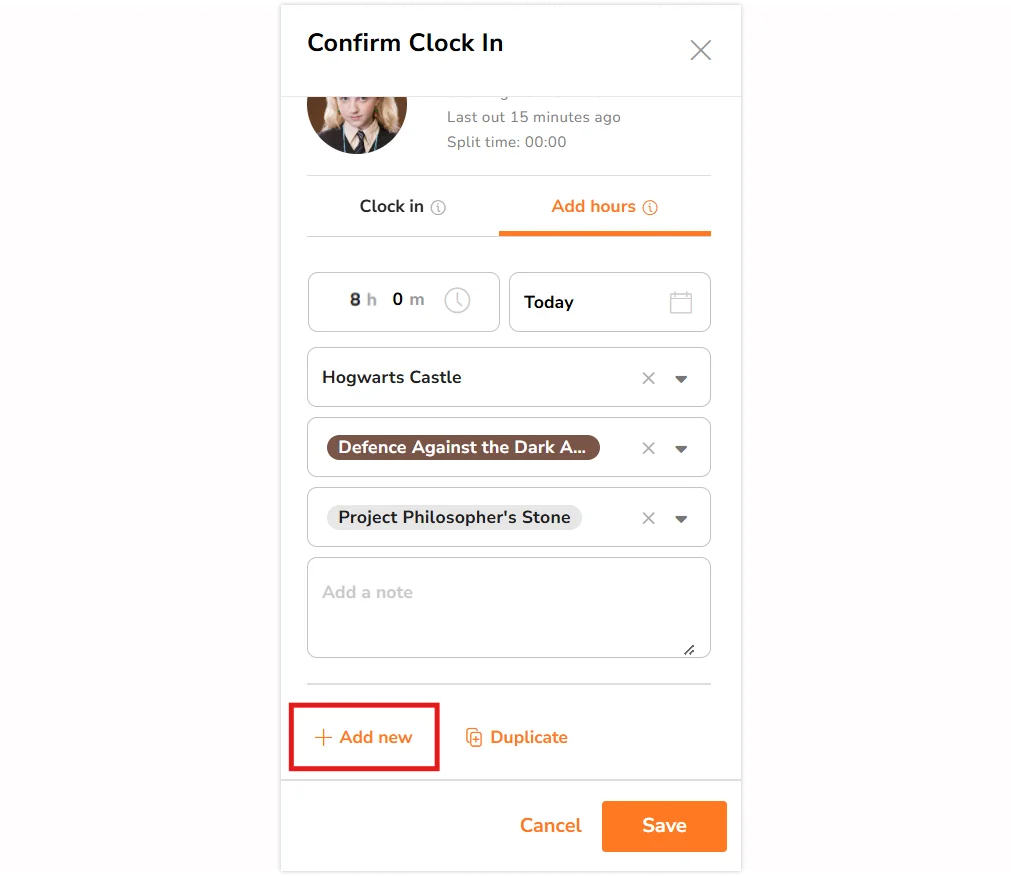
- Click Add New to create another entry and follow the same process.

- Ensure all required fields, such as duration, activity, project, and location, are filled in as needed.
- If you wish to duplicate an existing entry, click Duplicate and update the details accordingly.

- Once all your entries are complete, click Save to finalize.

Tips 💡:
- Hour entries are used to record the total work hours and related details.
- Time entries are for recording specific clock-in, break, and clock-out times.

