Getting started with Jibble’s Windows time tracker app
Track time on activities, projects and clients directly on your Windows desktop
Jibble’s Windows time tracker allows individuals and businesses to efficiently track work hours directly from their Windows desktop, improving productivity and providing valuable insights into time allocation. This guide will walk you through the steps to download and use Jibble’s time tracker on Windows.
Jibble’s time tracker for Windows is compatible with Windows 10 and later. If you’re using a Mac desktop, check out our guide on getting started with Jibble’s Mac time tracker.
This article covers:
Installing the Windows time tracker
- Visit the Jibble website (https://www.jibble.io) and sign up for an account if you haven’t already.
- Head over to the Microsoft Store and search for Jibble: Time Tracking.
- Click on the Install button.
- Follow the on-screen instructions to complete the installation.
Using the Windows time tracker
-
Clocking In and Out
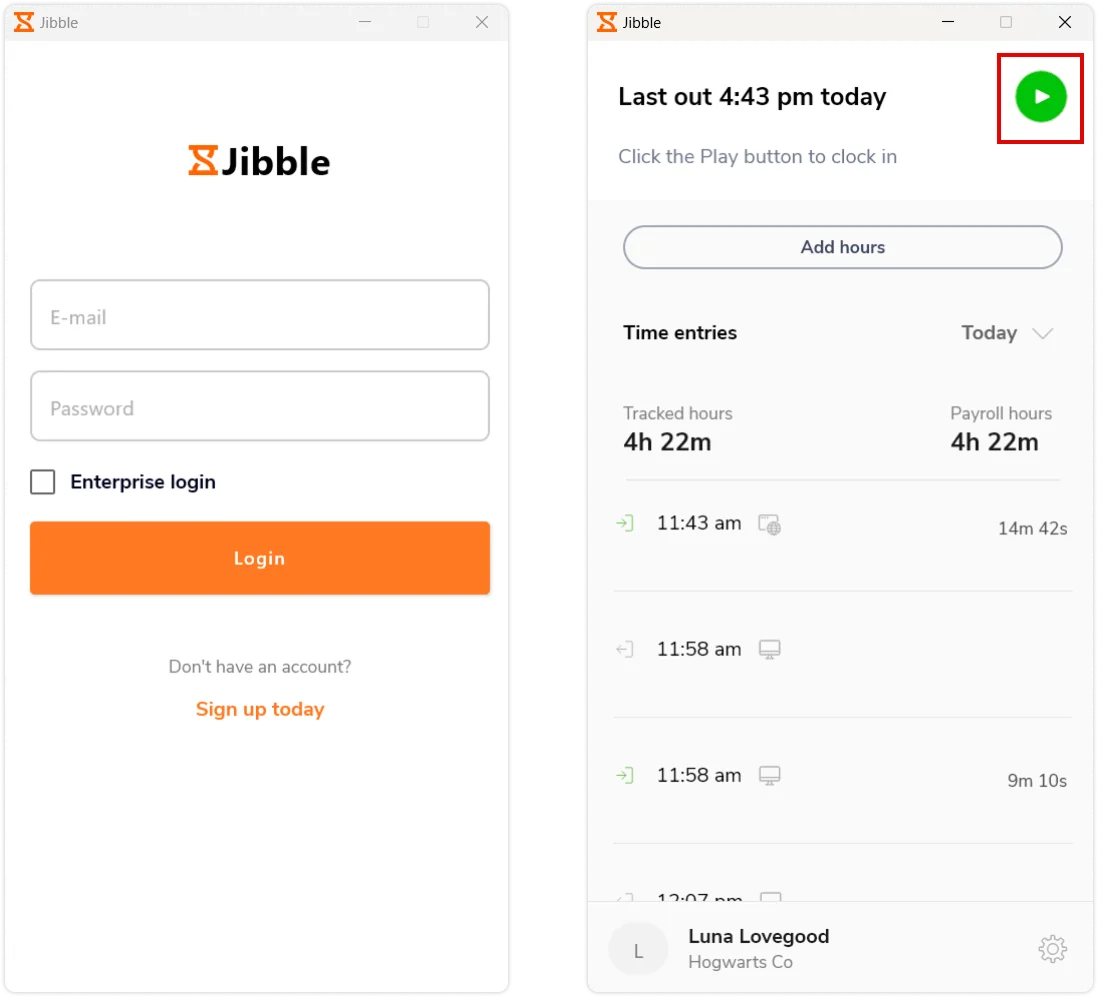
- Open up Jibble’s Windows time tracker and log in to your account.
- Once logged in, click on the green Play button to start tracking time.

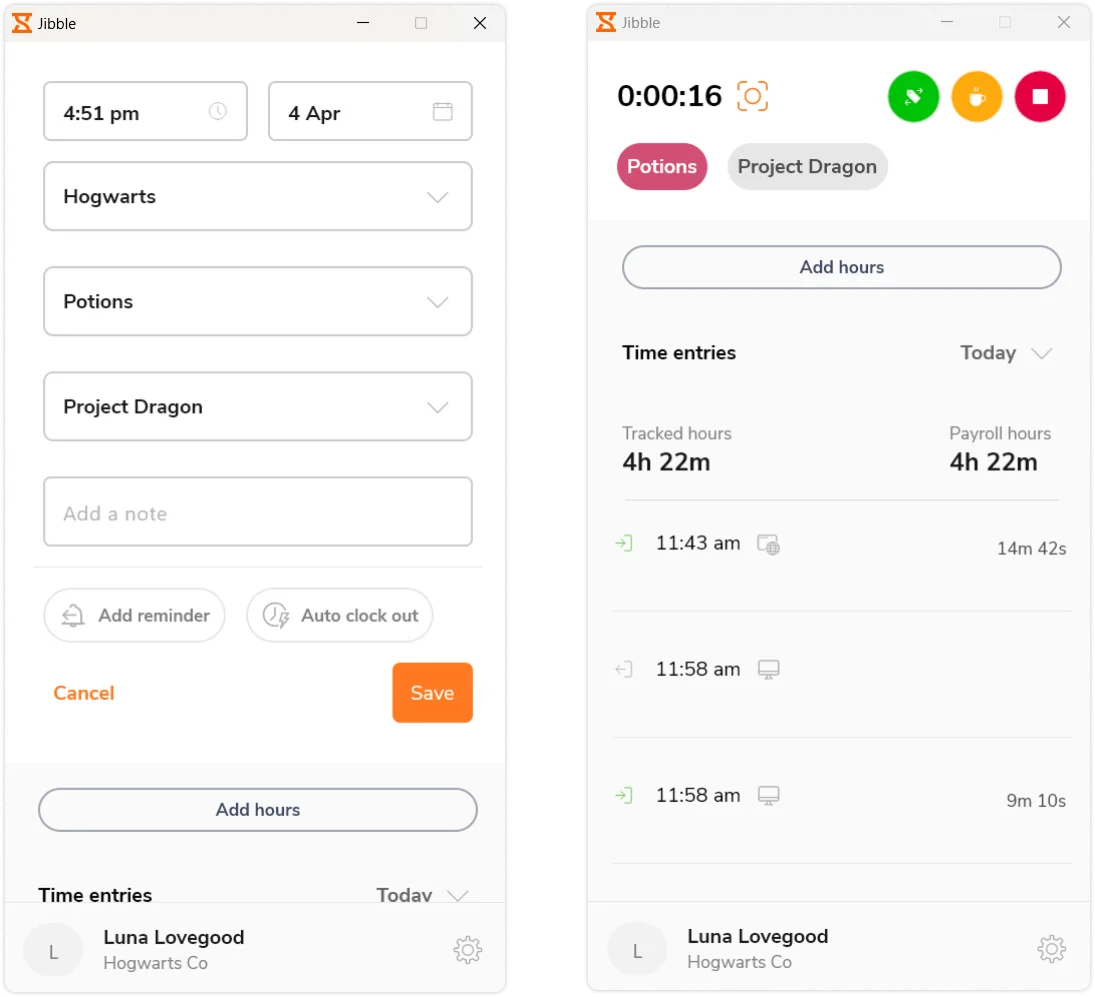
- Choose a location, activity and project if needed, and add any additional notes.
Tip: Save time by configuring a default activity, project and location for quicker clock ins.
- Tap on the Save button to clock in.

- After clocking in, you’ll notice various timer options.
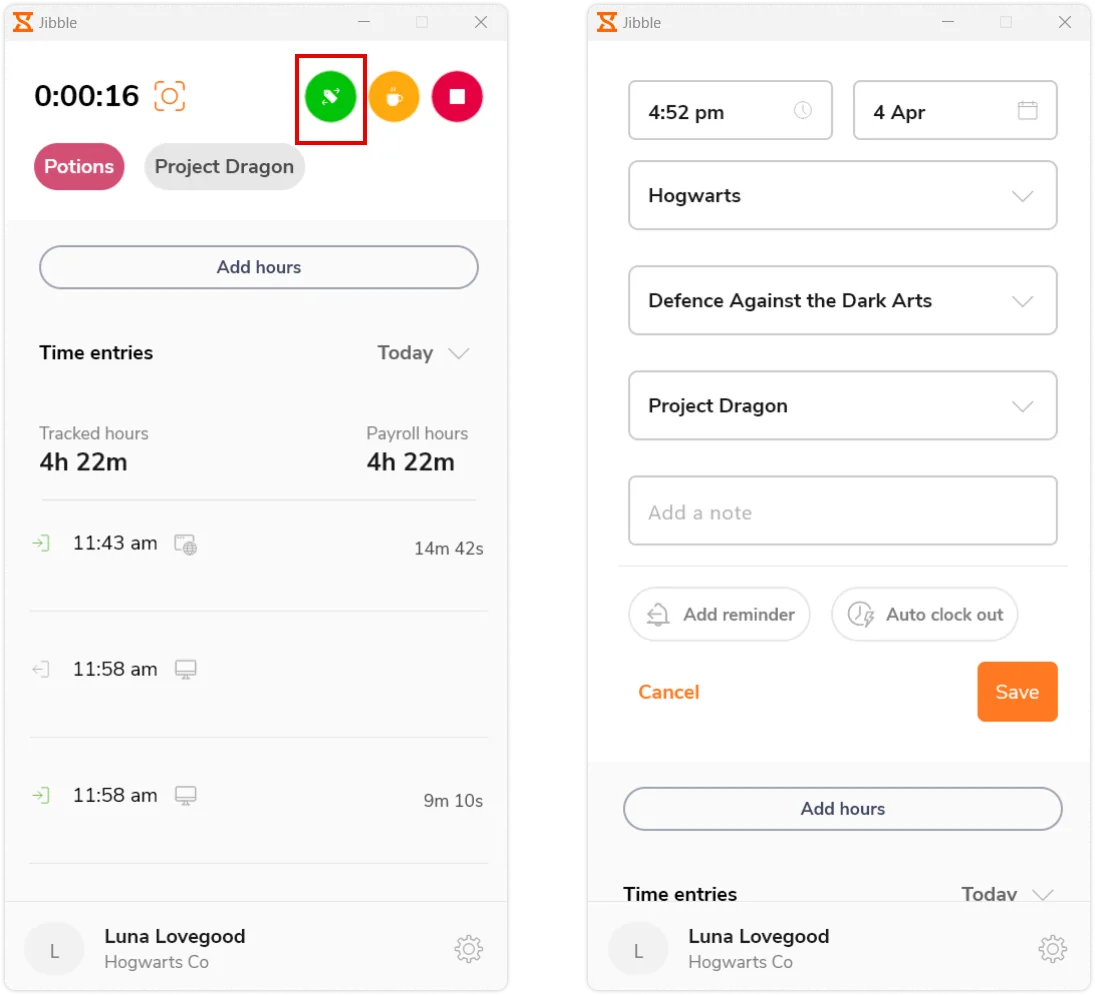
- To switch to a different activity or project, tap on the green Switch Activity button, select the desired activity and project, and click on Save button to clock in.

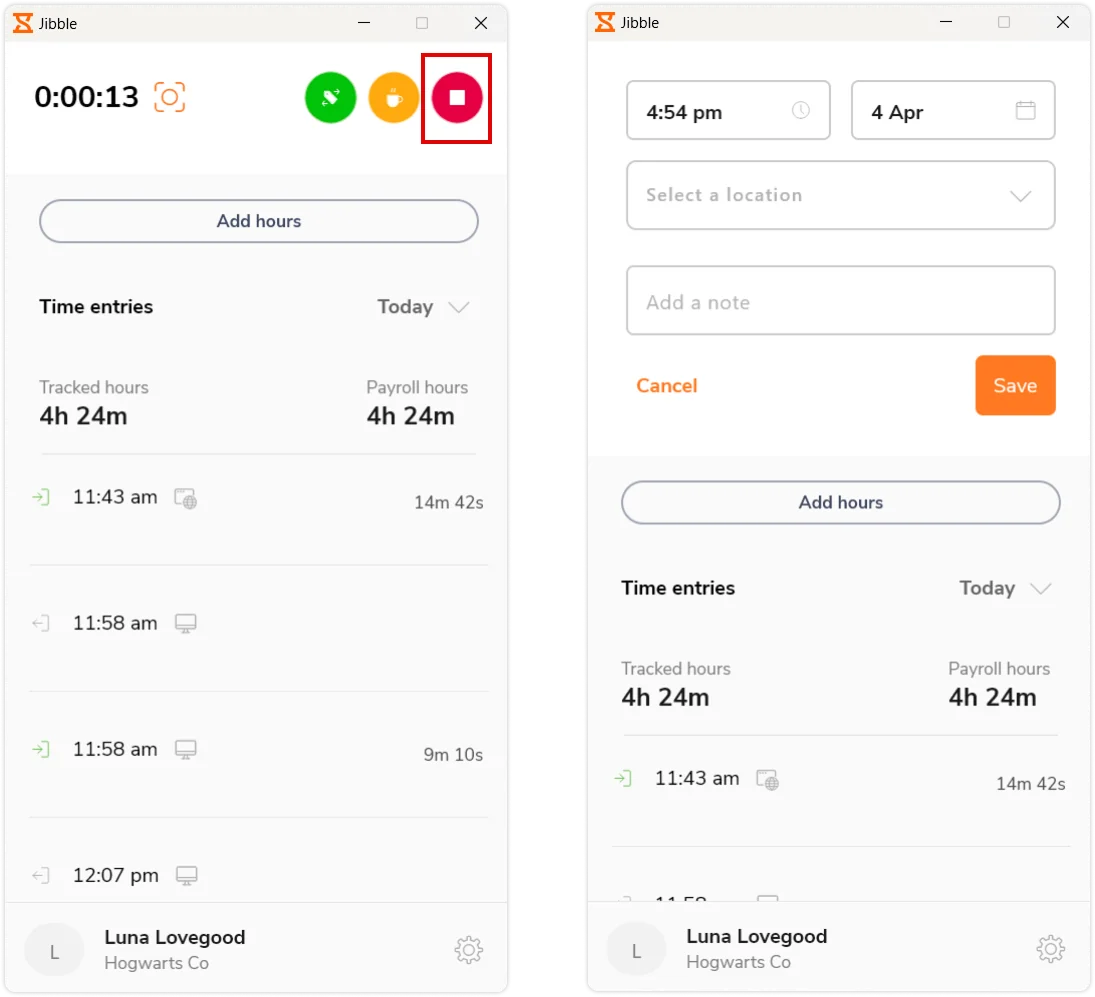
- When you’re ready to end your tracking session, click the red Stop button, add a note if needed and tap on the Save button to clock out.

-
Taking Breaks
In order to initiate a break, you should already be clocked in. If you have configured multiple break options, you will be able to select a break type.
- Clock in as you usually would. You must be currently clocked in to initiate a break.
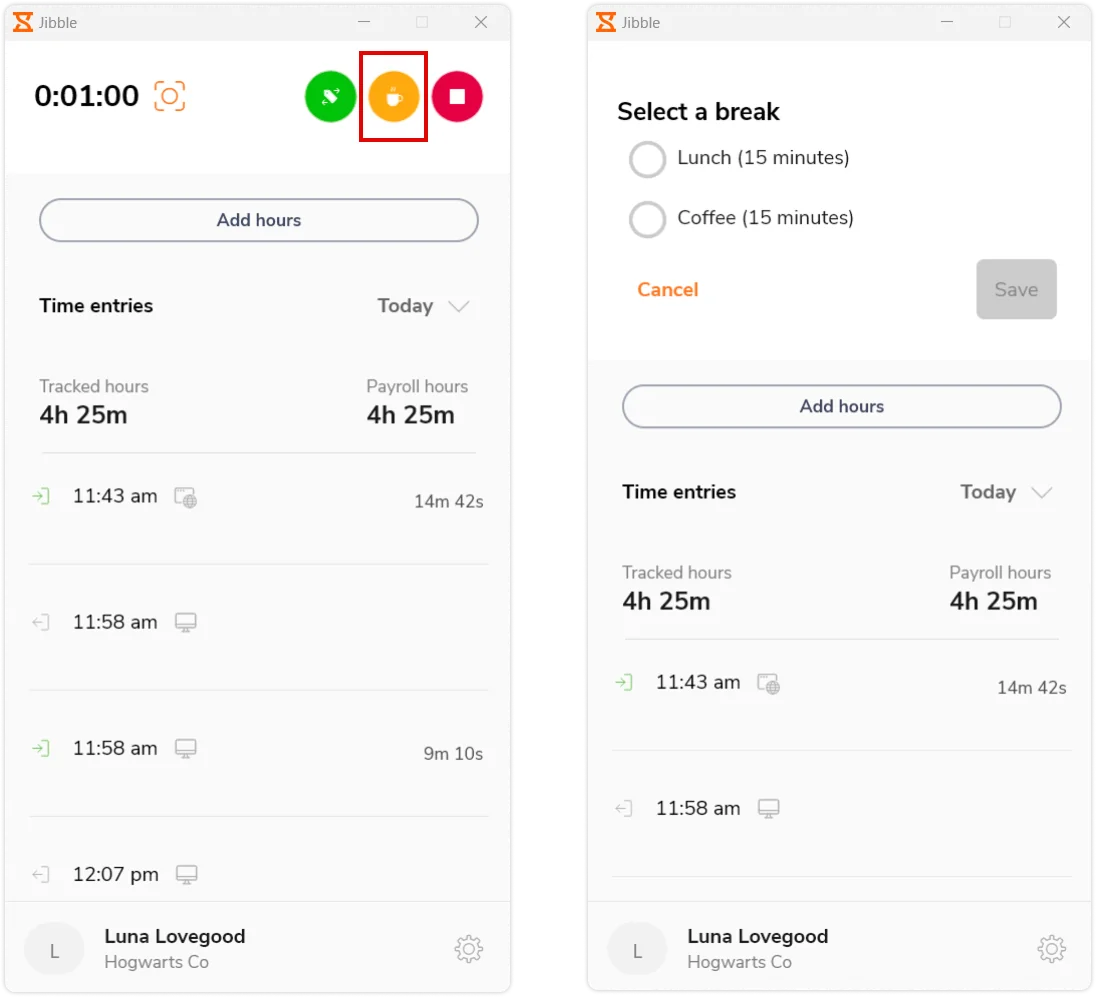
- Click on the yellow Break button.
- If you have multiple break types set up, select the desired break type and tap on the Save button to start your break.
Note: If you haven’t configured any breaks, clicking the yellow Break button will immediately start your break session.
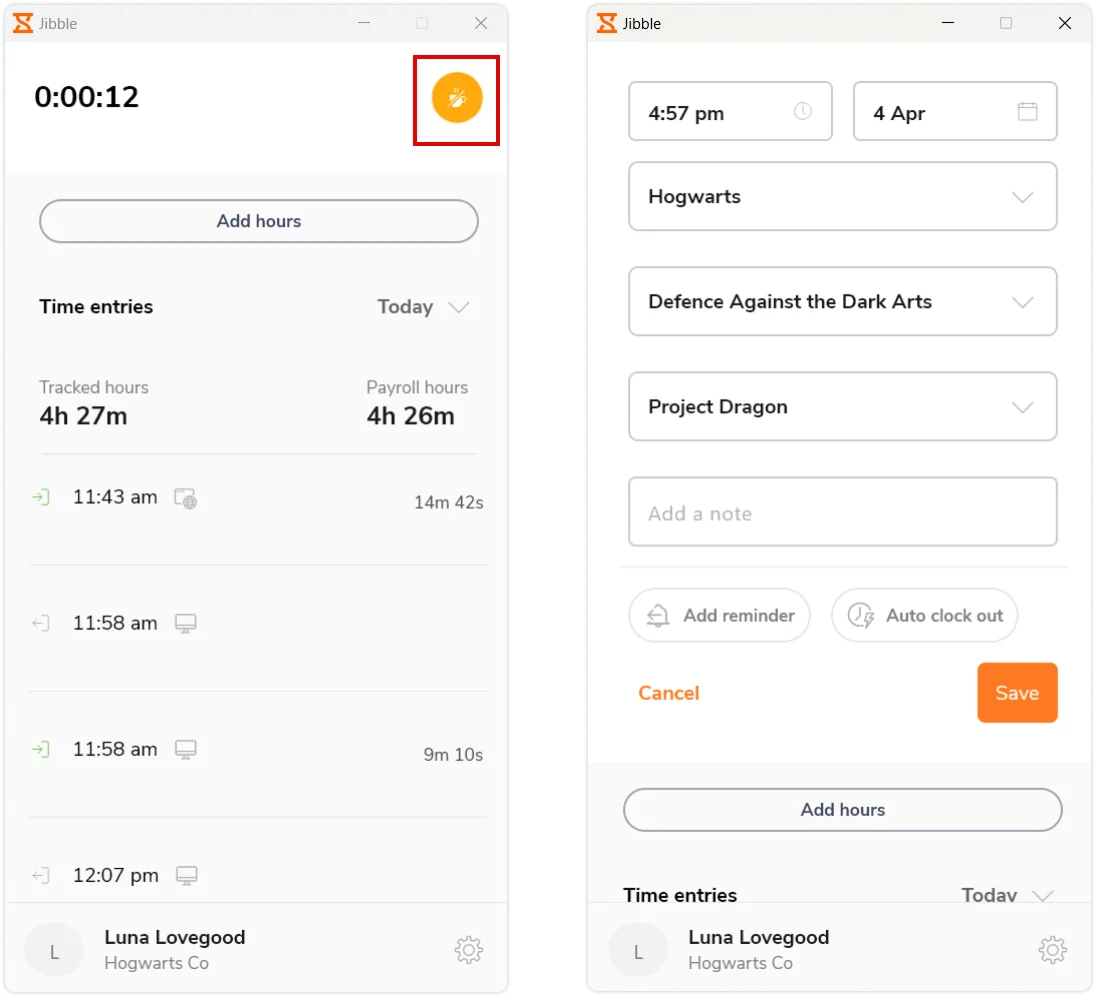
- To end a break and return to work, click on the yellow End Break button.
- If needed, select a location, activity, and project, add a note, and then click on the Save button to clock in.

-
Screenshot capturing
If screenshot capturing is enabled for you by your manager or admin, you will be blocked from tracking time on the desktop app until you allow screen capturing on your device.
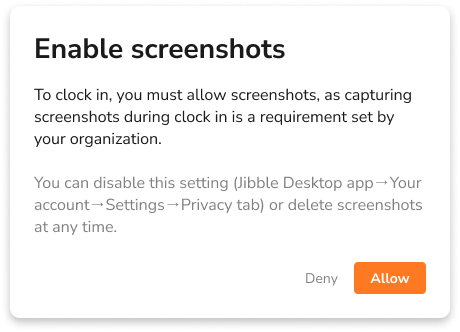
Once permissions are granted on your device, screenshots of all screens in the foreground will be captured randomly in a 1-10 minute interval. Screenshot capture will start when you clock in via the desktop app and stop during breaks, after clocking out or after quitting the desktop app.
For more information, read our article on how screen capturing works.
All screenshots captured can be viewed via the web app, where you will be able to view and delete your own screenshots. Read more on viewing and deleting screenshots.
-
Dashboard
Within the Windows Time Tracker Dashboard, you’ll find your time entries, tracked hours, and payroll hours for the current day.
Check out our article on the difference between tracked hours and payroll hours to learn more.
-
Account Settings
To access Account Settings, click on your name within the tab situated in the bottom section.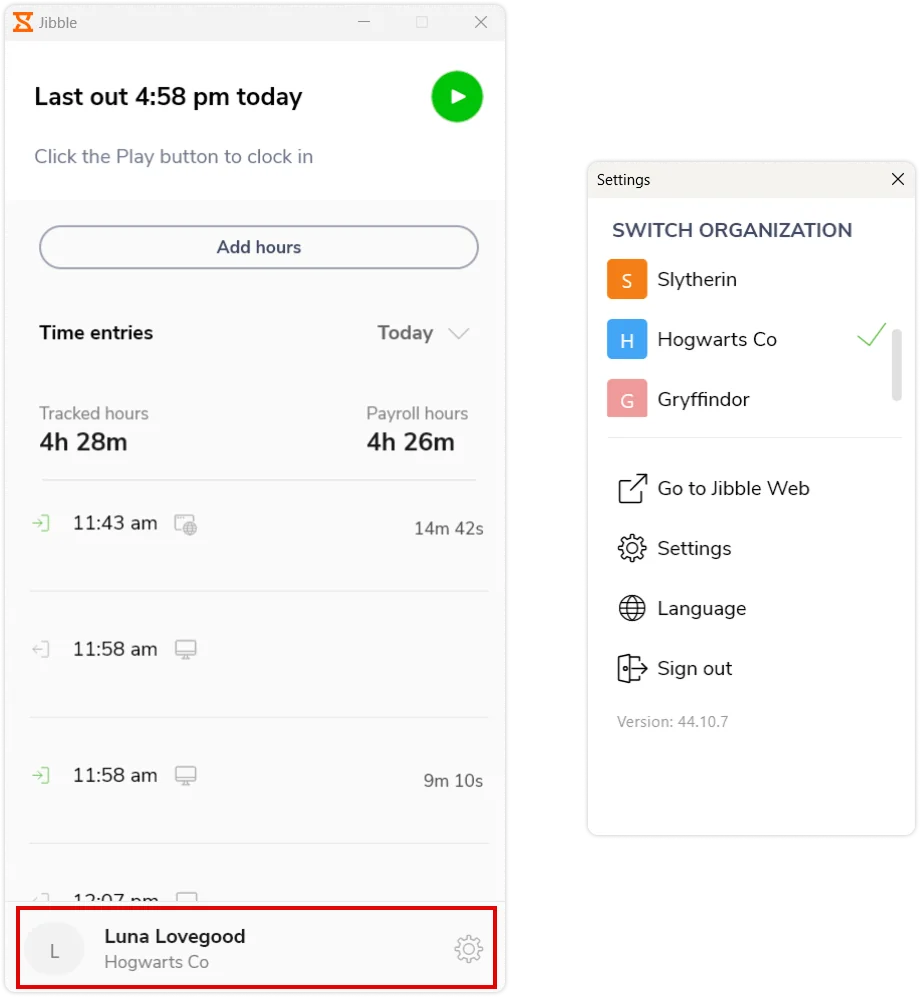
Here’s a shortlist of the options you will see:
1. Organization Details
If you are part of more than one organization, you have the flexibility to switch between them. Simply click on the organization you want to use to make the switch.
2. Jibble Web
To access extensive reporting capabilities and view captured screenshots, tap on the Go to Jibble Web button to be directed to your Jibble WebApp Dashboard.
3. Settings
Under the Settings tab, you’ll find two sections: General and Privacy.
- General: Customize your time tracking experience by enabling automatic clock-ins and clock-outs, and setting up a default activity, project, and location for seamless tracking.
- Privacy: This is where you can enable Screenshots to permit your device to capture screen images while using the desktop app. Note that if screenshot capturing is enforced for you, you’ll be unable to track time on the desktop app until you enable this setting.
4. Language
Change the desktop app’s language to your preference by selecting from our supported languages. Check out our article on supported languages for more information.
5. Sign Out
Click on Sign out to sign out of Jibble’s Windows time tracker.
-
Generating Reports
Utilize the Jibble web app to generate comprehensive reports and gain valuable insights into your time usage. The report functionality is accessible to owners, admins, and managers.
To learn more about the different report types and how to export reports via Jibble’s web app, check out what are the different types of reports that can be exported.

